Using Images
Using Images
Editing Images
What is Image Optimization?
Image Optimization is practice of reducing image sizes while retaining quality in order to boost webpage speeds and improve Search Engine Optimization (SEO). Overall this increases the likelihood the webpage will come up higher on the web search and increases the chances to be seen.
The size limit for images in Cascade is 1MB (1024KB) to best present your information to users. Analytics tells us that 53% of mobile site visitors leave a page that takes longer than three seconds to load. You do not want to lose visitors at that rate! It's important to resize your images to the smallest file size possible, without losing quality, to provide users the information they need in a timely manner and to help your site show up higher on search engines.
Resizing & Optimizing Images
The two things you may need to change about your image are file size and image size.
- File size refers to the amount of space required for your photo when it is stored on the server. Large file sizes will equal longer waits for your page to load. Not a good thing!
- Image size refers to the dimensions, or width and height of your photo as it appears on the page. It doesn't change how much storage space the image takes up, but can affect how it looks on your page.
If your file size is already small, but you need to adjust the way your image appears on the page:
- Learn about how to fit your image by understanding how aspect ratios work inside Rowan's Cascade
- Then, you can make small changes inside Cascade by following these instructions on image editing in Cascade.
If your image file is way too large, then the appearance of your image is probably also way too large for your page! You will need to adjust the image size in order to reduce the files size. Follow the instructions below for decreasing the size of both the file and appearance.
There are many ways to resize your photos to decrease file size. We suggest using Photoshop for experienced users or Fotor for beginners.
Color Profiles
Prior to resizing an image, make sure that you remove the existing color profile from the image so that the colors may be converted to sRGB when exported. This optimizes the color settings for the web.
Using Photoshop
- Open Photoshop and go to File > Open and select your image.
- Check the Color Profile of the image.
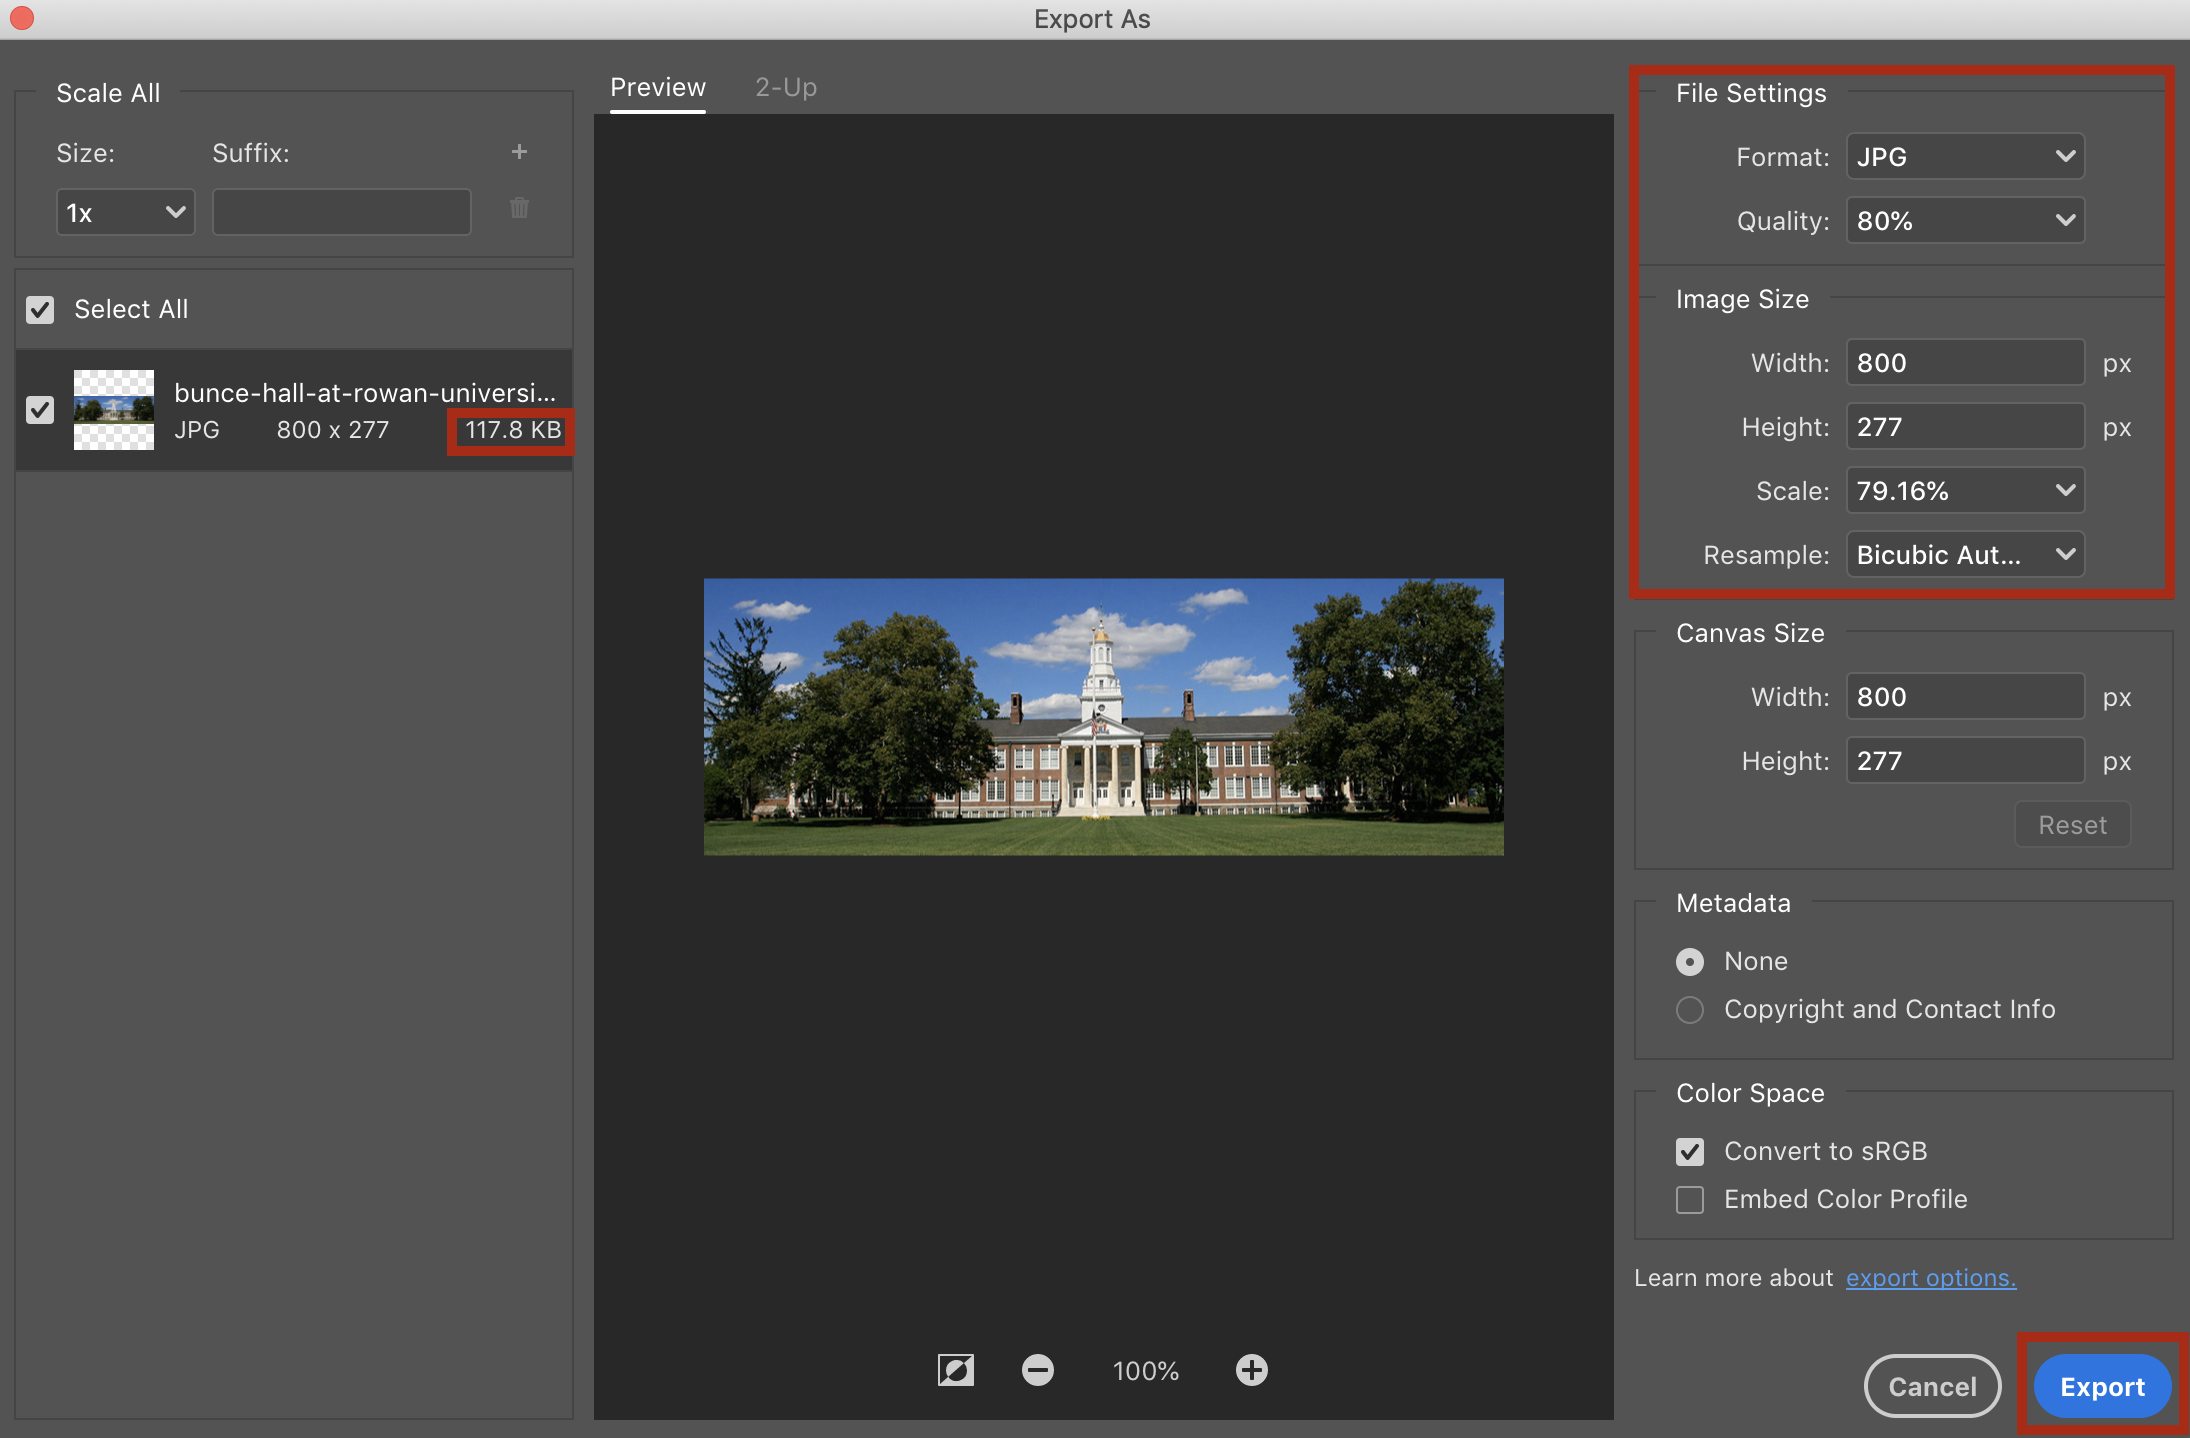
- In the top menu, click File > Export > Export As…
- Under File Settings select your format (JPG)
- Set Quality
Tip: Try to set quality between 60-80% (newer version of Photoshop select: Good or Very Good). If the image is blurry or contains text, you may want to set a higher quality, 80-100% (newer version of Photoshop select: Excellent or Great) . - Under Image Size, set the appropriate width (the height will automatically scale).
Tip: Unless you want your image to span the entire width of the webpage, try to keep your image width under 800px. - Important: Keep Convert to sRGB checked and Embed Color Profile unchecked
- Note the size of the image on the upper left side. If it’s under 1MB (1024KB), your image meets the limit.
- Click the Export button to save your image.
Using Fotor
- Visit Fotor.com
- Click Edit a Photo
- Click Open Image and select your image
- Click Resize on the left side menu
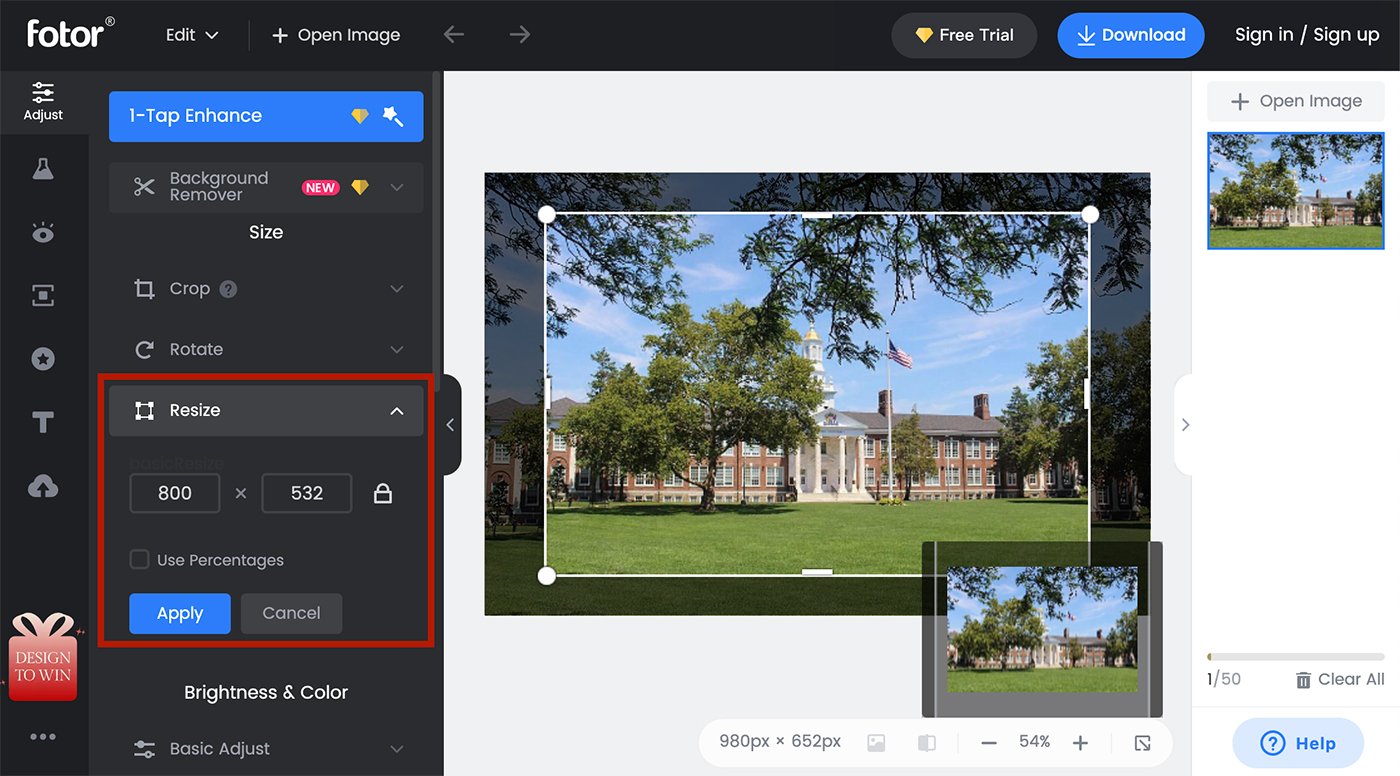
- Enter width (the height will automatically scale)
- Click Apply
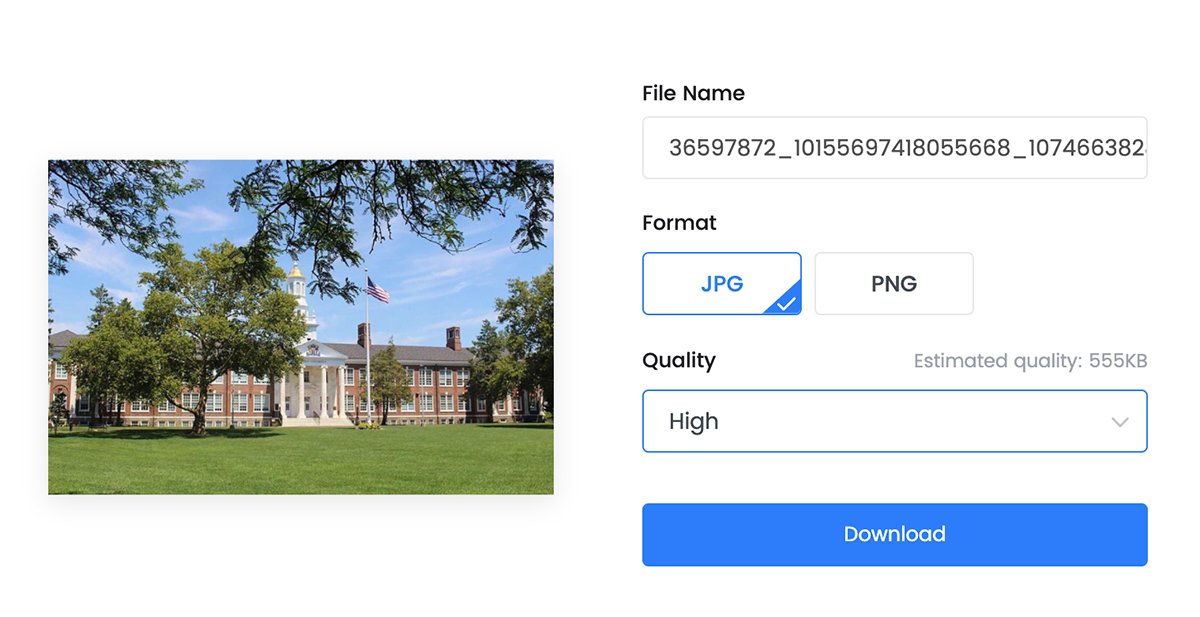
- Click Download on top menu
- Select Format (JPG) and Quality (Medium or High)
- Click Download button
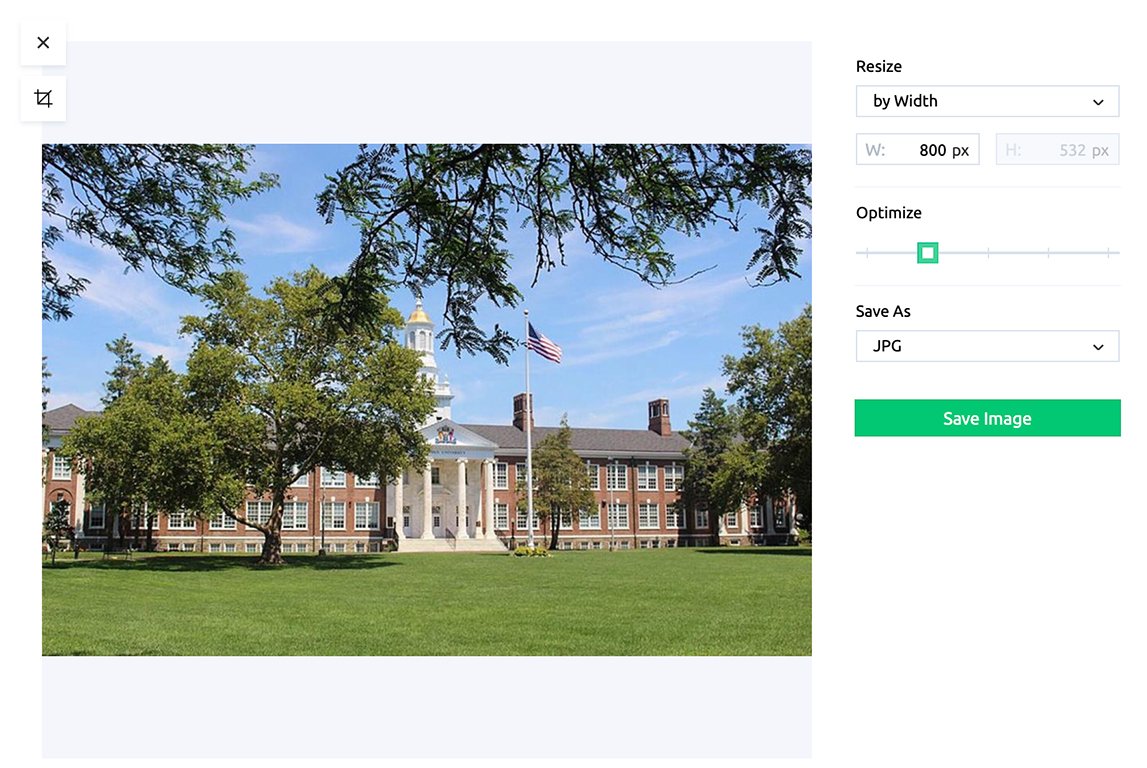
Quick & Easy Image Resize
If you want a quick and simple way to resize your image follow the steps below:
- Visit https://resizing.app
- Click Green Plus Icon to upload image
- Resize image width (the height will automatically scale)
- Set optimization level (more optimization = lower quality)
- Click Save Image to download