Editing Images
Editing Images
Edit an image size inside of Cascade (Best for WYSIWYG images)
Remember! Image size referes to the dimensions, or width and height of your photo. It doesn't change how much storage space the image takes up. If your image is too large for Cascade, see the information on how to shrink the size of your image fileEditing Images
Cascade CMS allows you to do very minor editing to your images. It will resize them (where the whole image is made smaller) or crop them (where you cut out parts of the image).
Entering editing mode
You will be offered the oppportunity to edit your image or banner image when you add it as content, but you can always open a previously uploaded image for editing later.
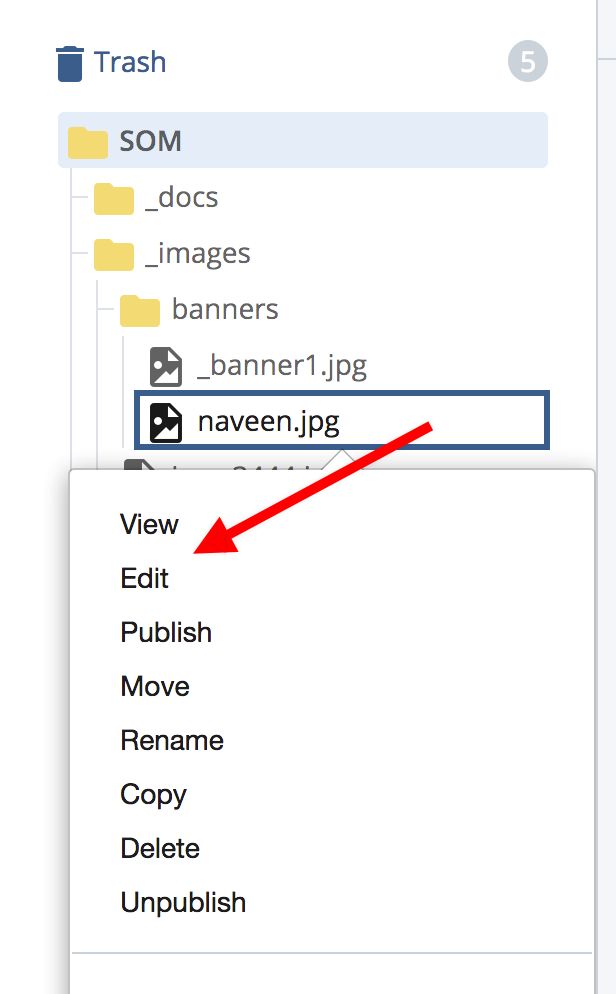
In site content, right click on your image file and choose "edit."
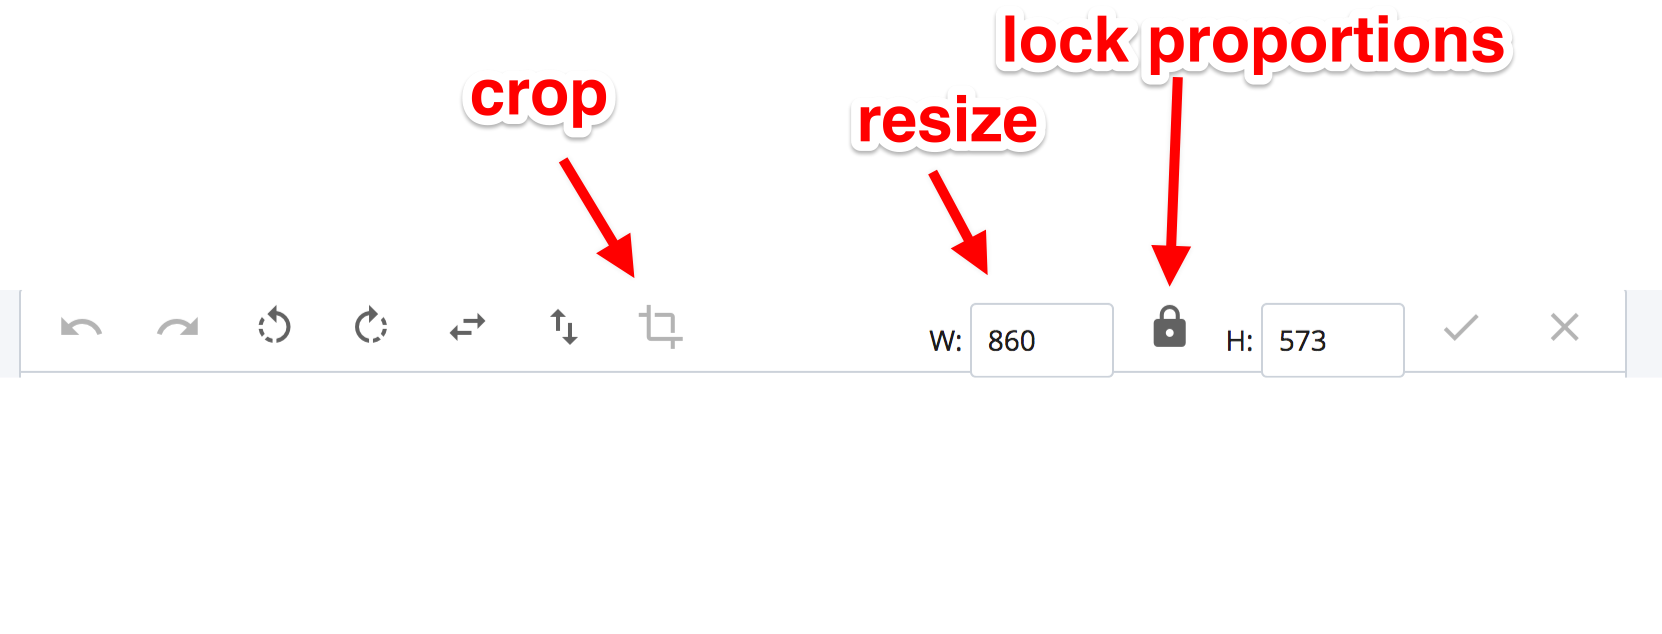
When your image opens you will see a new toolbar with image editing options. The ones we will look at here are labeled in the screen shot below:
Resizing an image
To resize your image:
- Make sure you have locked the "lock proportions" icon.
- Choose and enter the new width of your image measured in pixels (probably less than 800 px)
- Click the check mark.
It may take a few minutes depending upon how large your image was to start with, but once it is finished click the "save and preview" button and be sure to "submit" it if it suits you.
Cropping your image
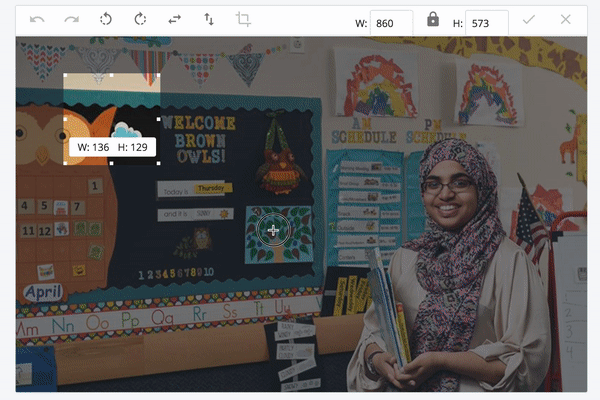
Before you click buttons on the tool bar, drag your cursor across the image. You will see a selection frame appear and numbers indicating the size of your current selection. You can adjust this by moving the whole frame or by dragging on any corner. (Note: at this writing, adjusting the selection does not work well in Firefox. Use Chrome or Safari if you have them.)
Once you have your selection set to your liking, click the crop tool.
As always click "save and preview," then submit to complete your edit.