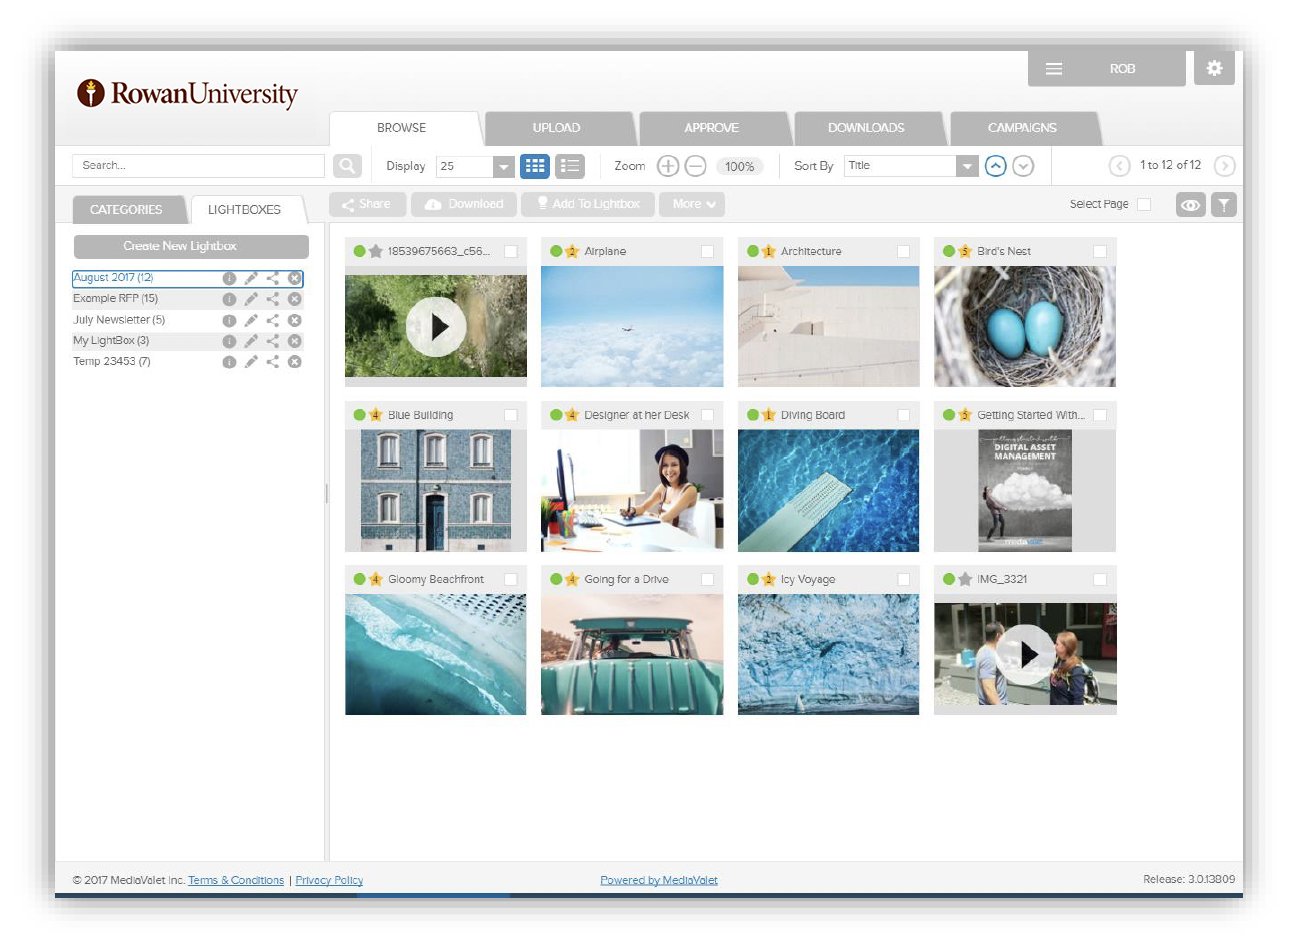
Use lightboxes
Use lightboxes
Step-by-step guide to adding and editing lightboxes
A lightbox is a convenient, personal collection of assets that you can create and store on MediaCloud.
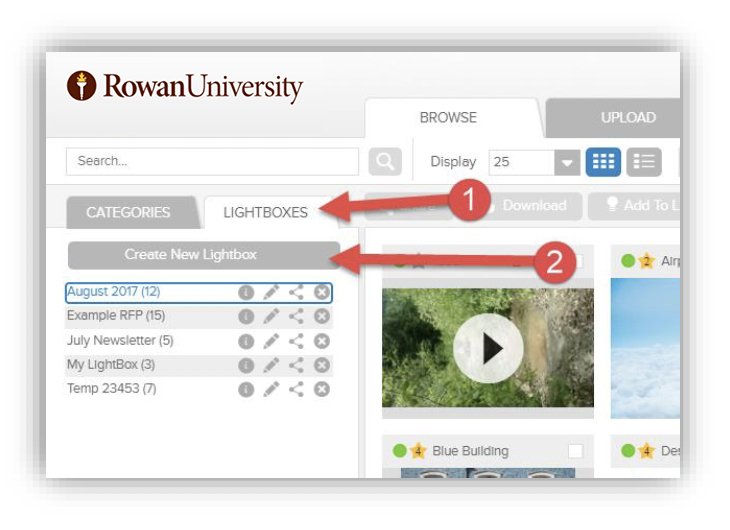
STEP 1: Creating a lightbox
From the Browse screen click on the “Lightboxes” tab to bring up your list of lightboxes. Then below the “Lightboxes” tab click the “Create New LightBox” button. This will open the lightbox creation screen.
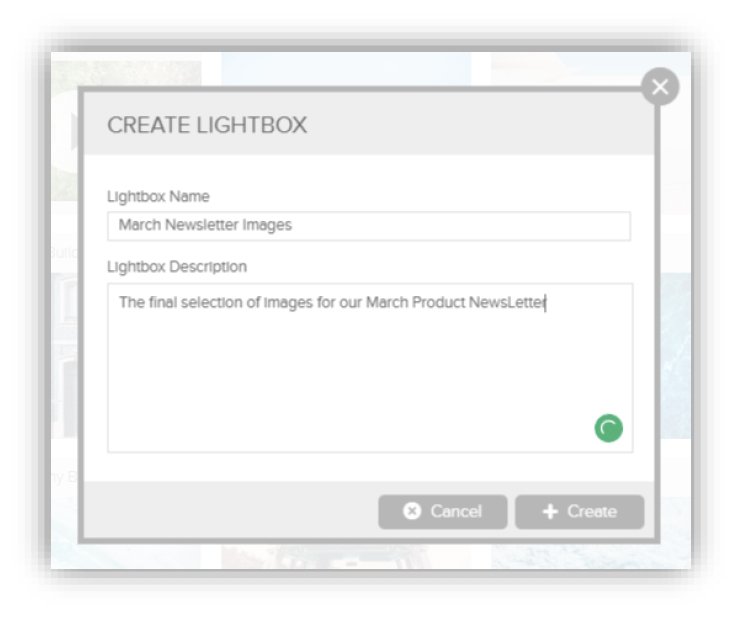
STEP 2: Name the lightbox
Once the lightbox creation screen opens you can enter a name for the lightbox and enter a description as well. Once you have entered these details click the “Create” button and your new lightbox will be added to your lightbox list.
STEP 3: Adding assets to your new lightbox
Search or browse through the MediaCloud library to find the assets you want to add to a lightbox. Once you find an asset (or assets) you want to add, check the box on the top right of the thumbnail and then click “Add to Lightbox” at the top of your page. When you click the add to lightbox button you will be given the option to pick a lightbox from your list of available lightboxes.
STEP 4: Viewing and editing a lightbox
To view a lightbox, click the lightbox tab and you will see your list of lightboxes. From there, simply click on the one you want to see and the contents will appear. By default, the assets in your lightbox will be sorted in alphabetical order based on file name.
You can easily remove an asset from a lightbox if you decide it's not necessary. The process is very similar to the way you added them, just find the asset(s) you want to remove, click on the check box to select them and then from the ‘more’ menu at the top of the screen click on "Remove Asset." This action only removes the asset from your lightbox—it doesn’t delete the asset from the system.
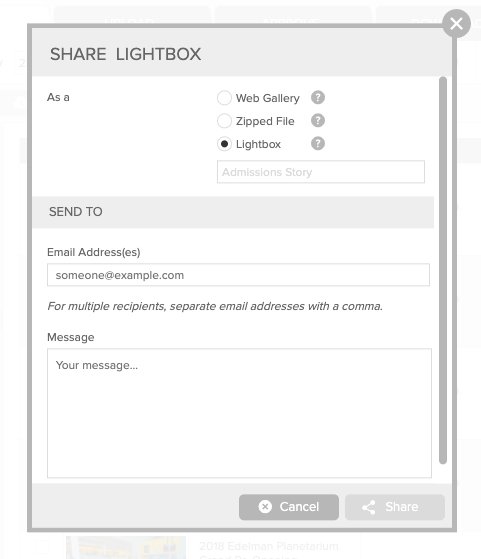
STEP 5: Sharing a lightbox
You can easily share your lightbox with other MediaCloud users in your organization, and you can even send it to people who don’t have a MediaCloud account. Please note: the way MediaCloud shares lightboxes with internal and external users differs (see below).
To share a lightbox you just need to click on the ‘share’ button next to the name of your lightbox.

The “Share Lightbox” window will appear. From there, you will have some options to choose from before you hit send.
Internal users
When sharing a lightbox with an internal user—someone with a MediaCloud account—the system will email a "secured link" to the recipient. The recipient will be asked to login using there Rowan credentials before they can access the assets in the lightbox. Only the intended recipient will be able to login—the link cannot be forwarded to different user—it will not work as intended. Once the recipient successfully logs in, they will also see the lightbox added to their list of lightboxes and the lightbox will update dynamically when changes are made by the lightbox's owner.
External users
When sharing a lightbox with someone without a MediaCloud account, the recipient will receive an email with an "unsecured link" as well as a message from you if desired. When the recipient clicks the link they will be taken to the MediaCloud Web Gallery and not be able to see anything else (no categories, search, other lightboxes etc.). The email link will expire 30 days after lightbox is shared and because it's nort secure, it can be forwarded and shared with anyone with an email address. In addition, because it's not a true lightbox, the web gallery will not dynamically update if the lightbox owner makes a change.