Upload assets
Upload assets
Step-by-step guide to contributing assets
STEP 1
Once you have successfully logged in you will be presented with the dashboard screen. You can familiarize yourself with the system or you can get started straight away by clicking on the “Upload” tab at the top of the page.
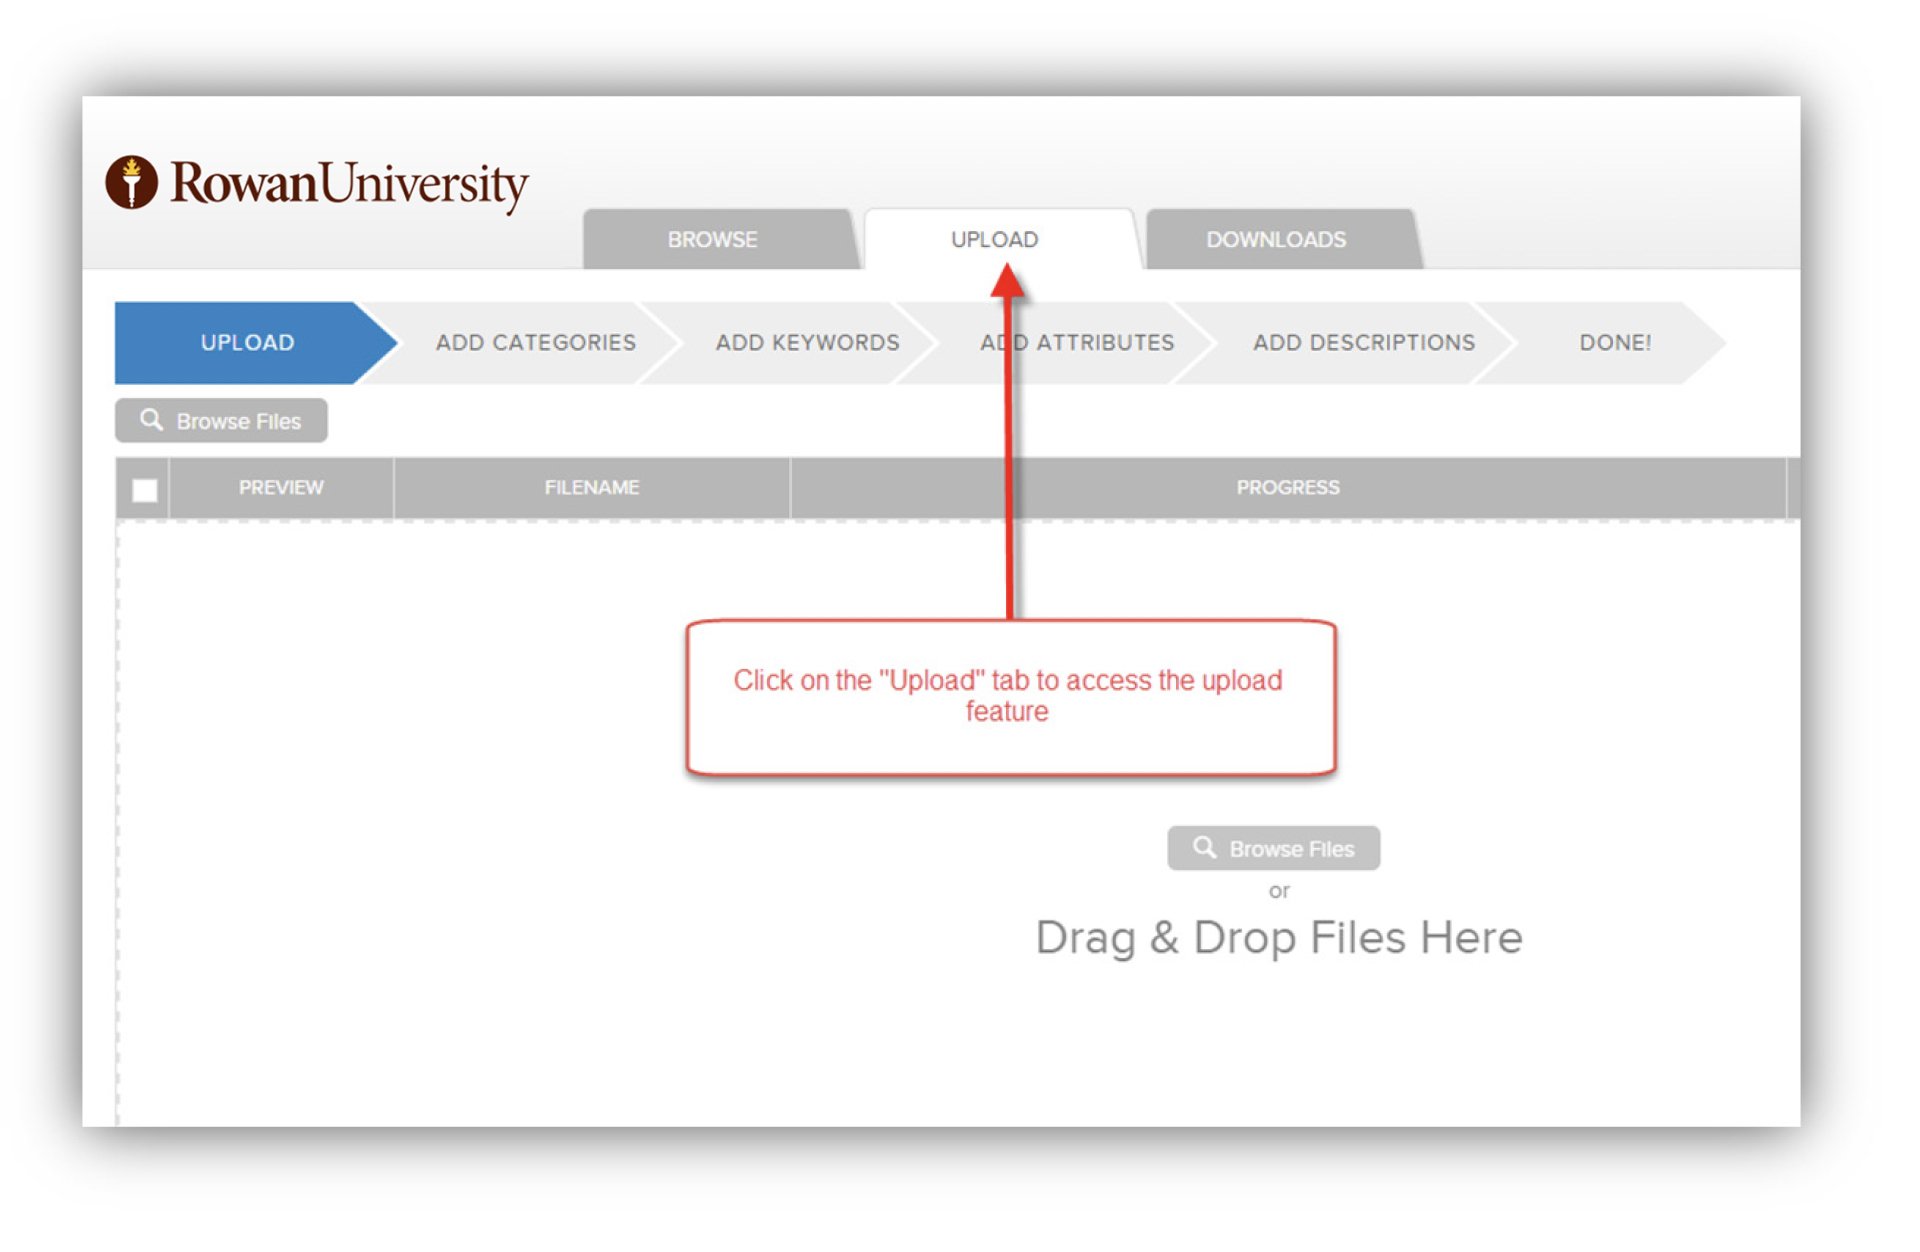 Either drag and drop files from your computer to where it says, “Drag & Drop Files Here” or you can click on “Browse Files” to open a file window where you can browse files you want to upload.
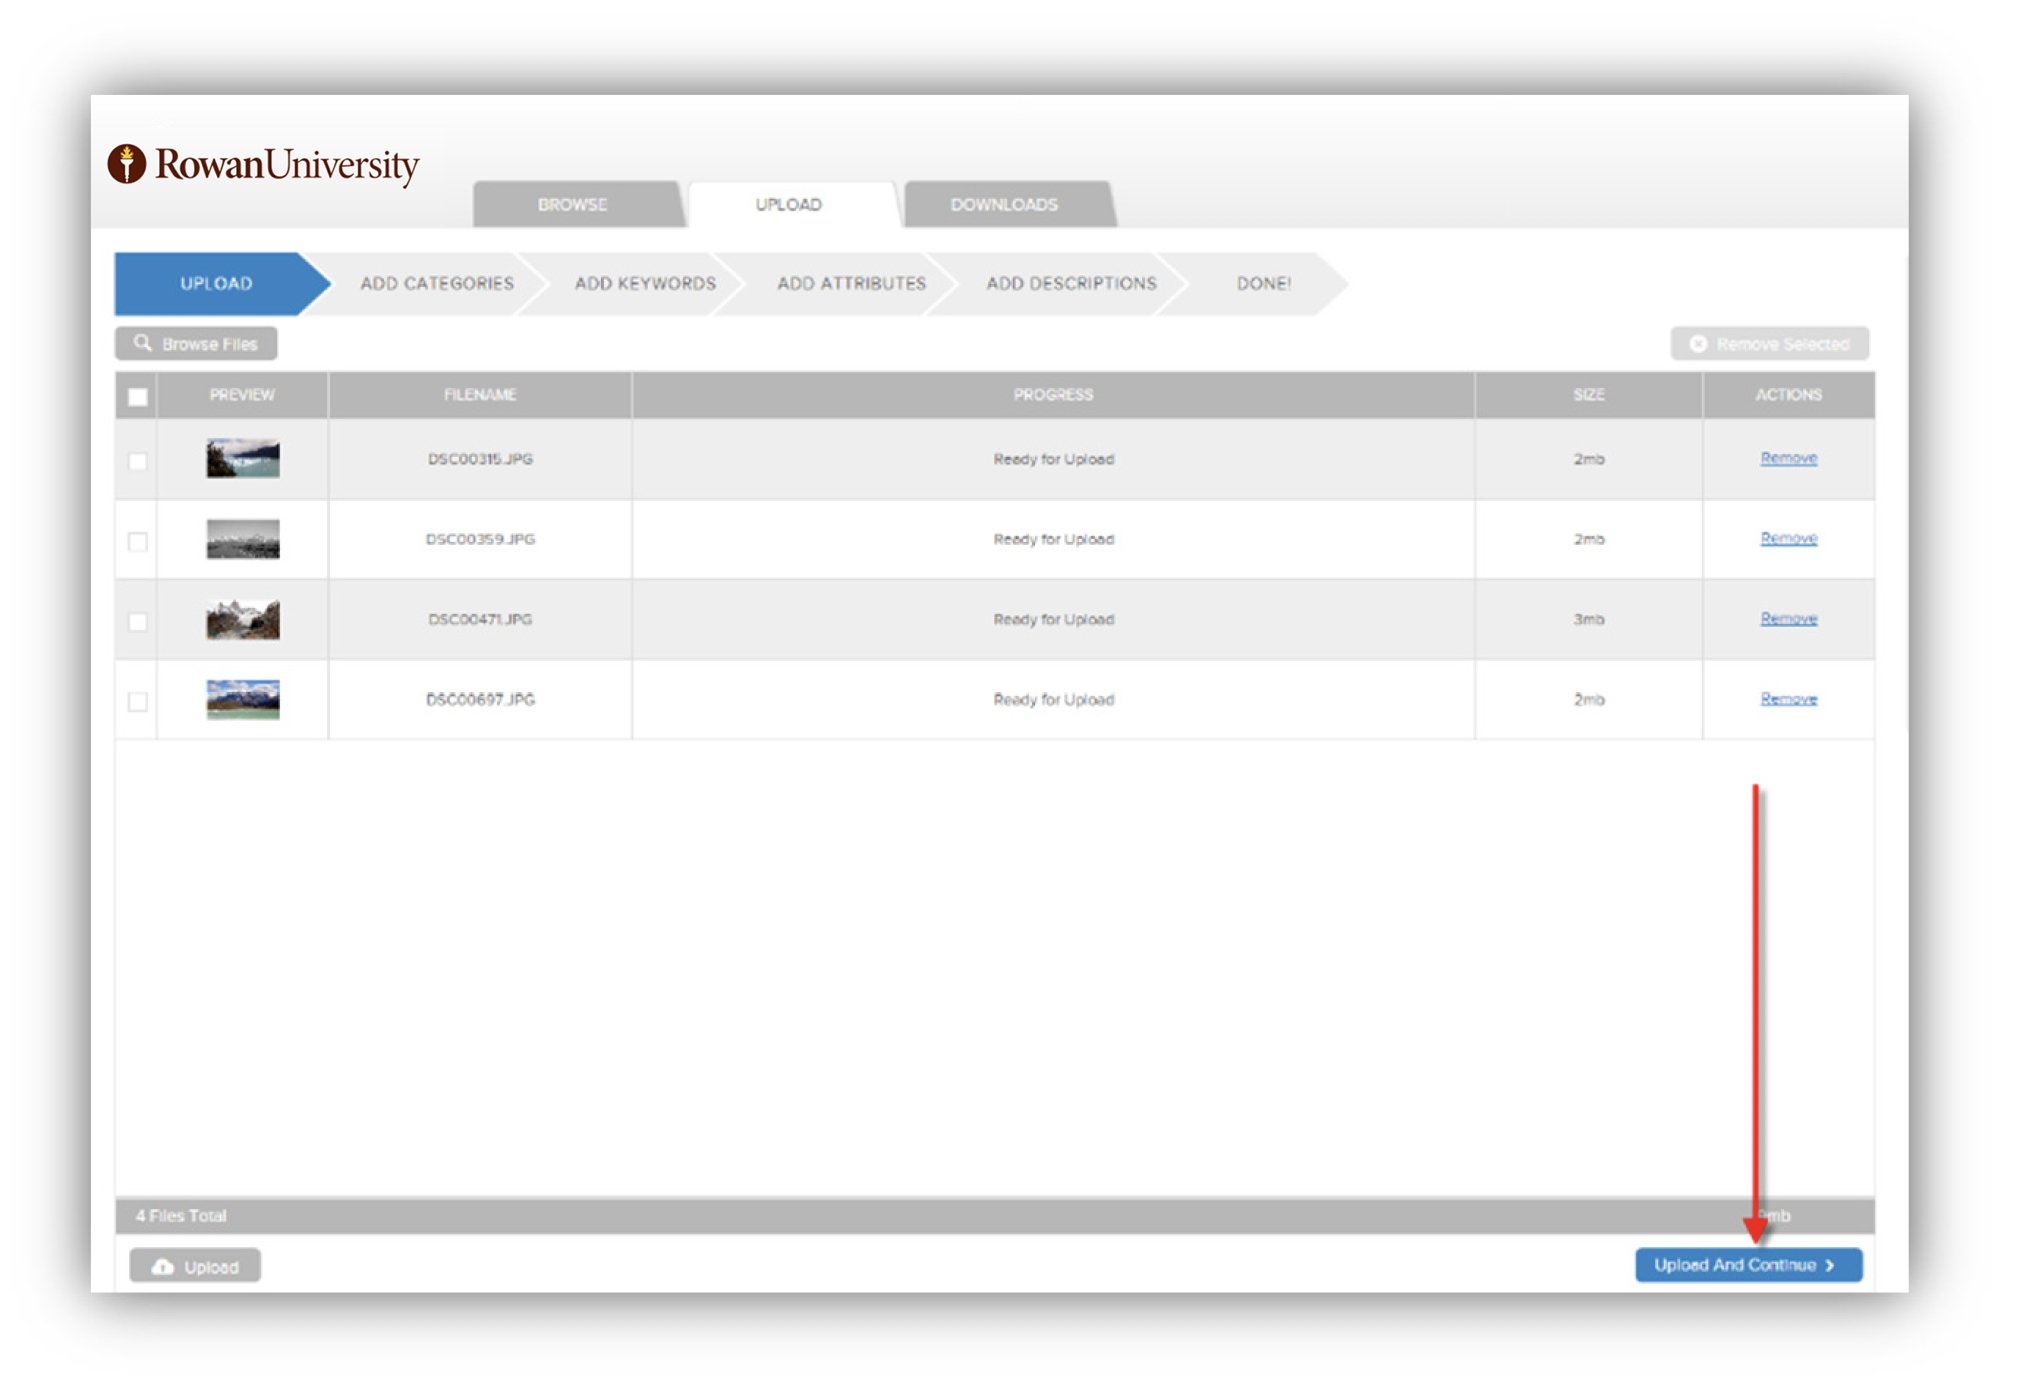
Once you have selected the files you wish to contribute, you are ready to proceed to the next step—so just click on the “Upload & Continue” button on the bottom right.
STEP 2: Indicate where the assets belong
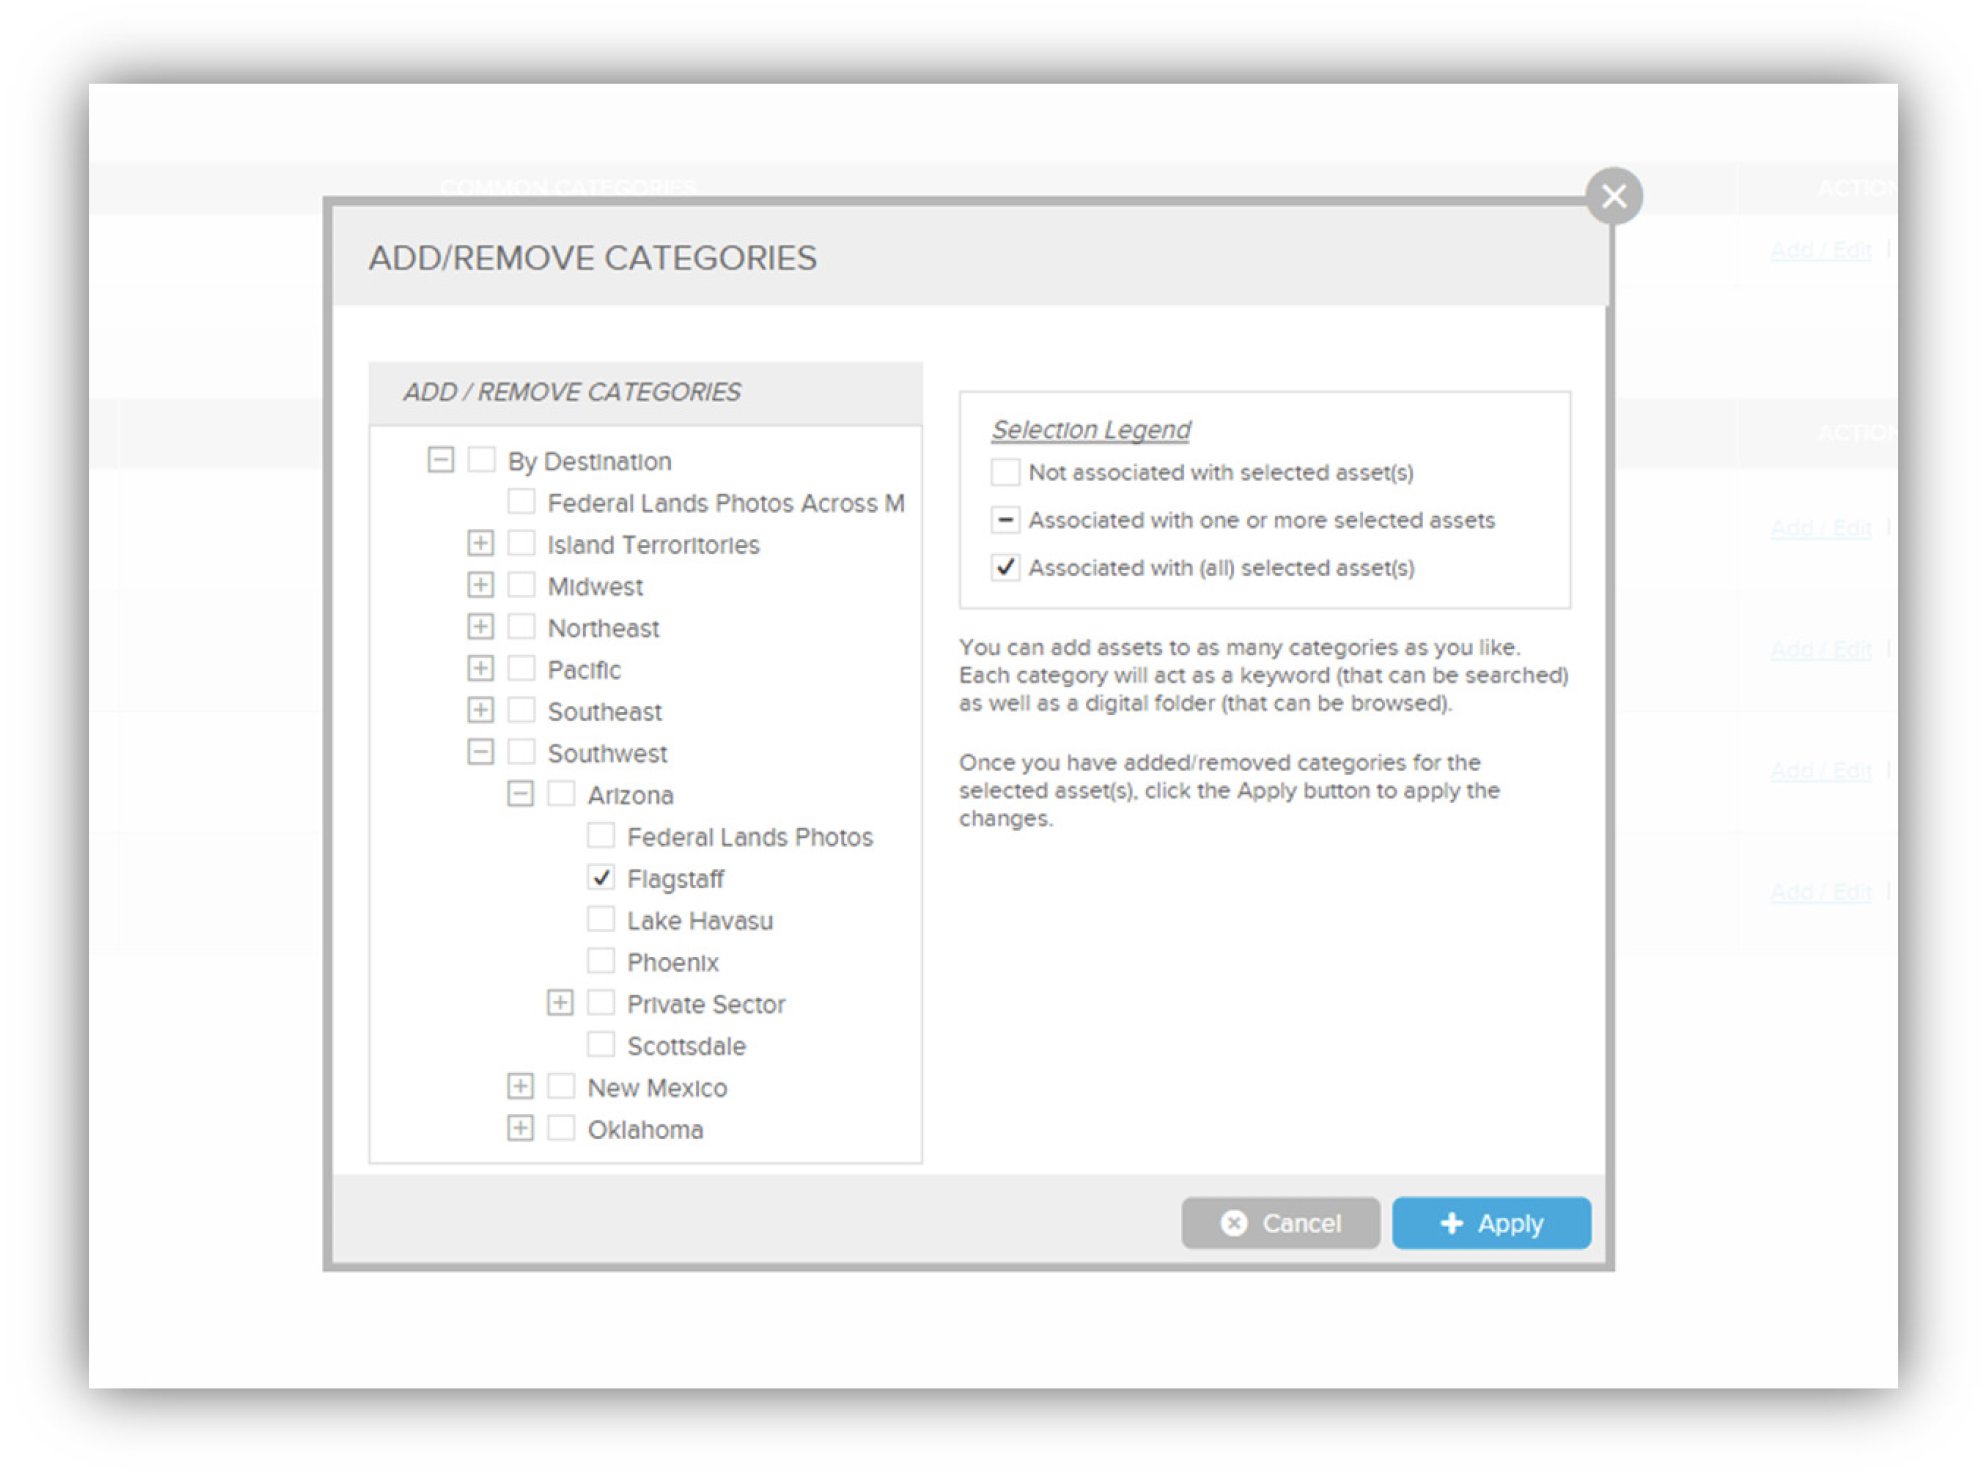
In this step, identify where you think these assets should be stored in the library. For example, if you’re contributing videos and images that portray student life and feature a sculpture, then you might want to add these assets to the “Student Life” Category and “Public Art” Category.
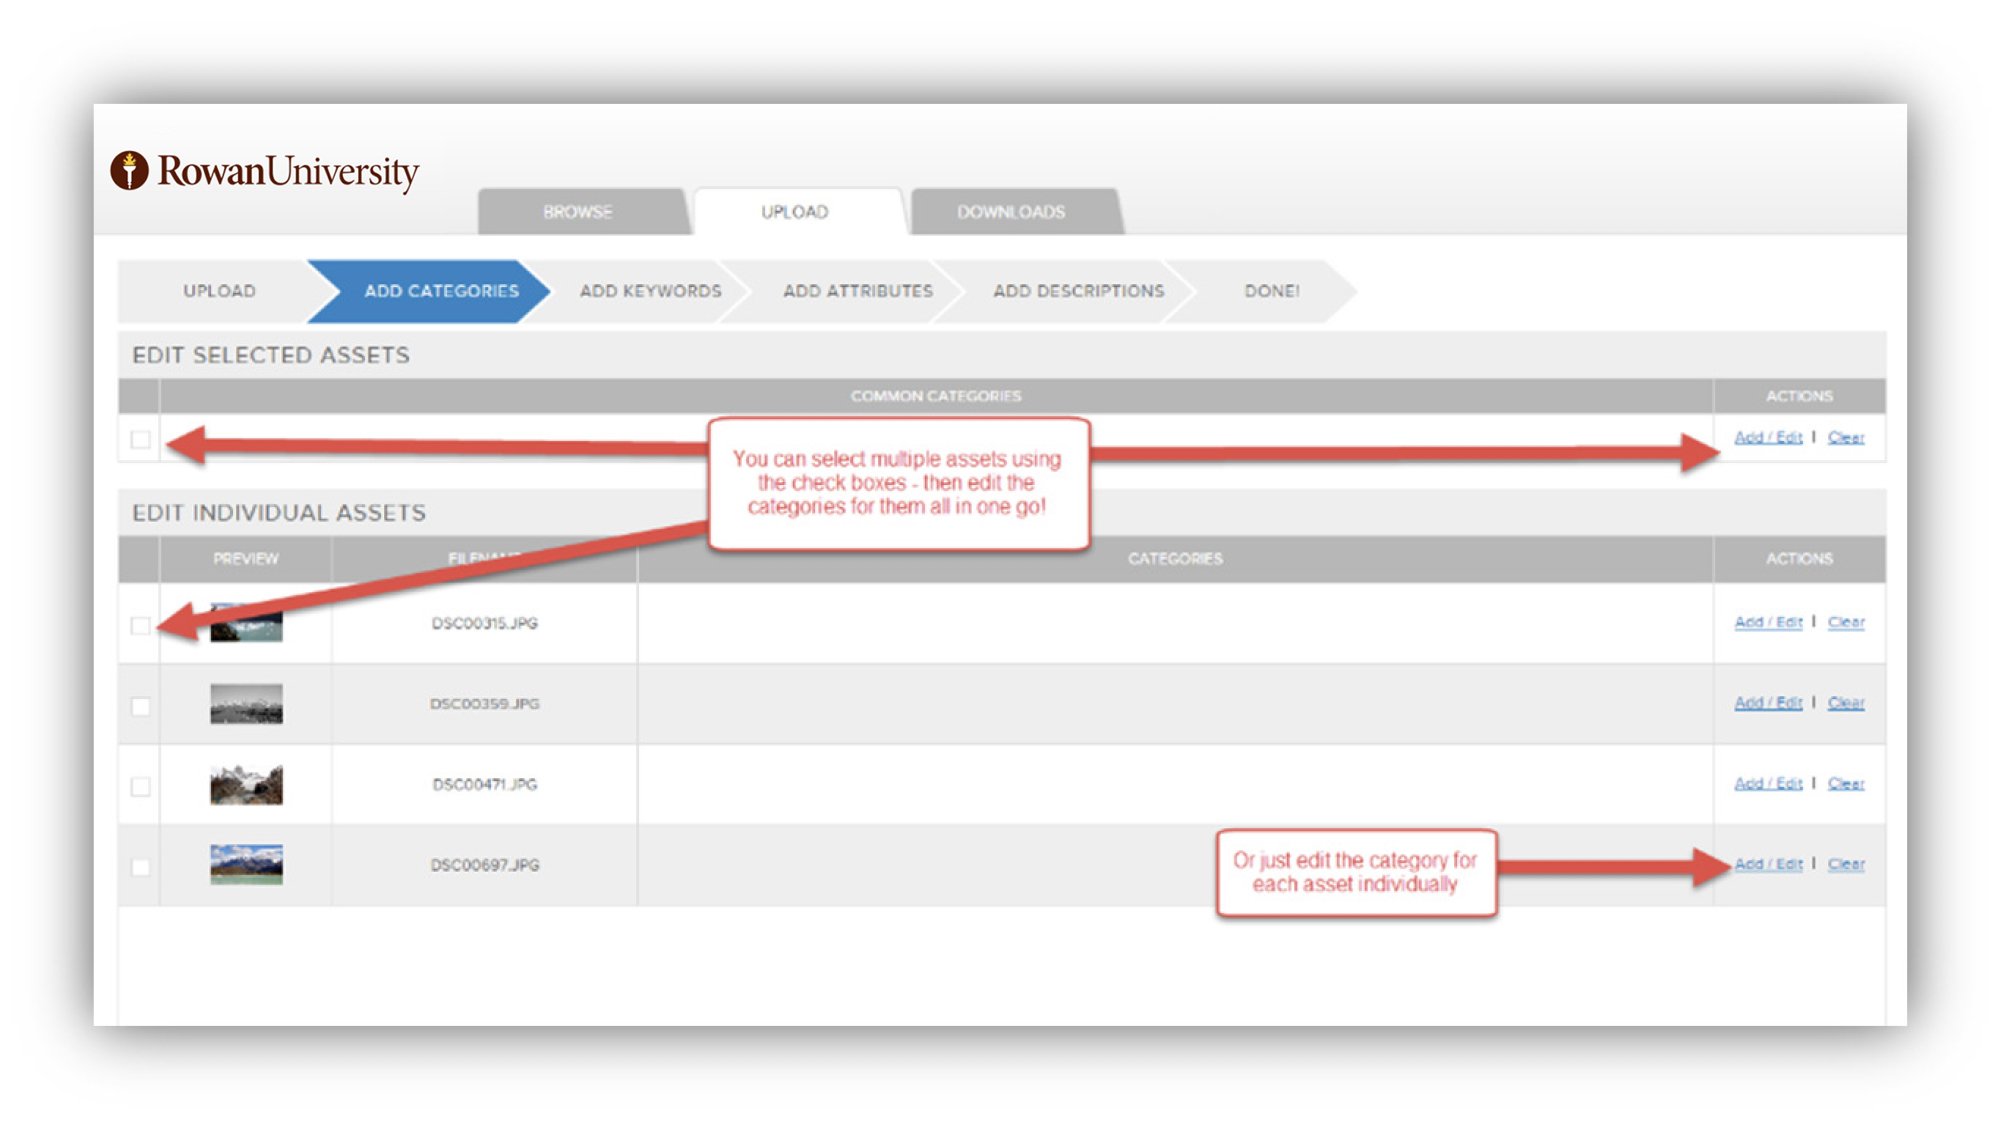
Choosing your categories is easy, you can just click on the “add/edit” button on the right. You can either do it individually or you can do several or all your assets in one go—you choose! When you click on the “Add/Edit” button a window will appear giving you the option to choose which of the categories your assets belong to.
Remember that the same asset can belong to a number of different categories so check as the boxes that cover everywhere you think your asset should be available.
STEP 3: Add keywords to your assets
Keywords are descriptive or informative words that help to explain the content of your asset. For example, if you are contributing a picture of a mountain with a lake and some snow, you might want to add the keywords “mountain” “lake” and “snow.” Keywords are to help people find your asset in future.
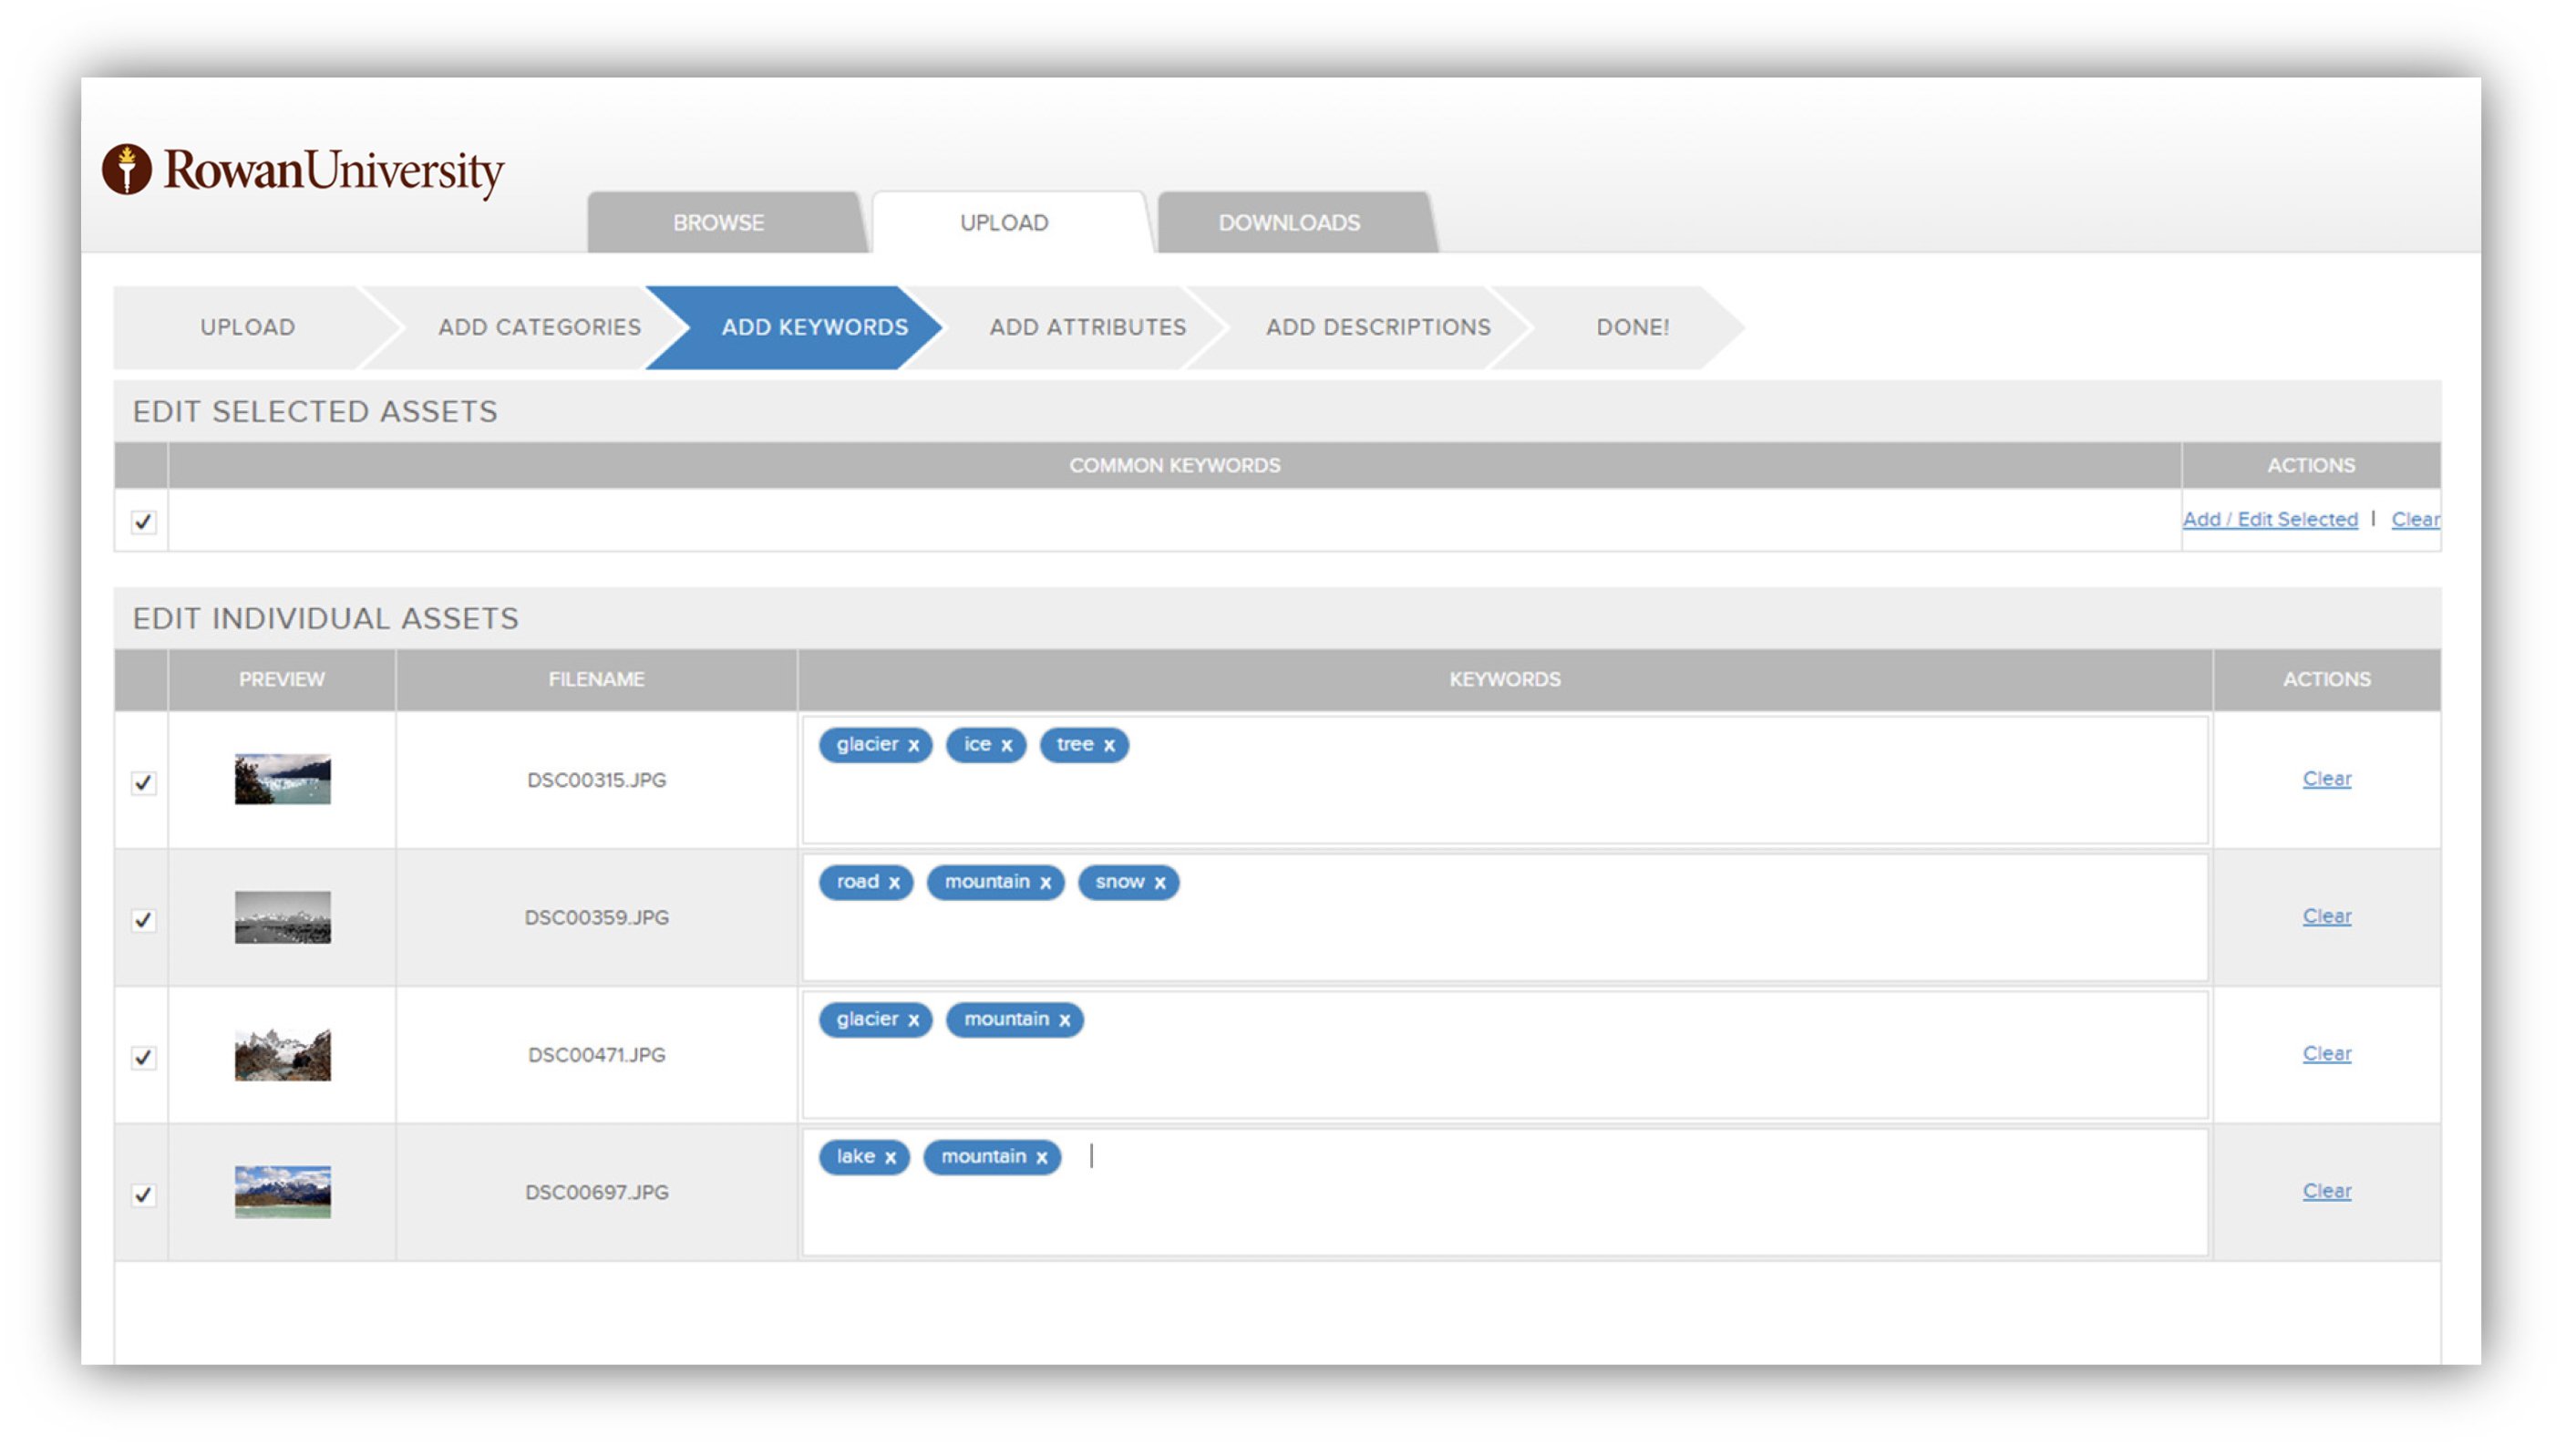
Adding keywords is easy—again it can be done individually or if your assets are all very similar you can group them together (by checking the boxes) and then add the same keywords for all of them. To add a keyword just start typing into the keyword box. As you type you may see some suggestions popping up for other keywords that have been used before, you can pick a suggestion by clicking on it. To delete a keyword just click on the little ‘X’ next to the keyword.
All done adding keywords? Click on the “Continue” button on the bottom right.
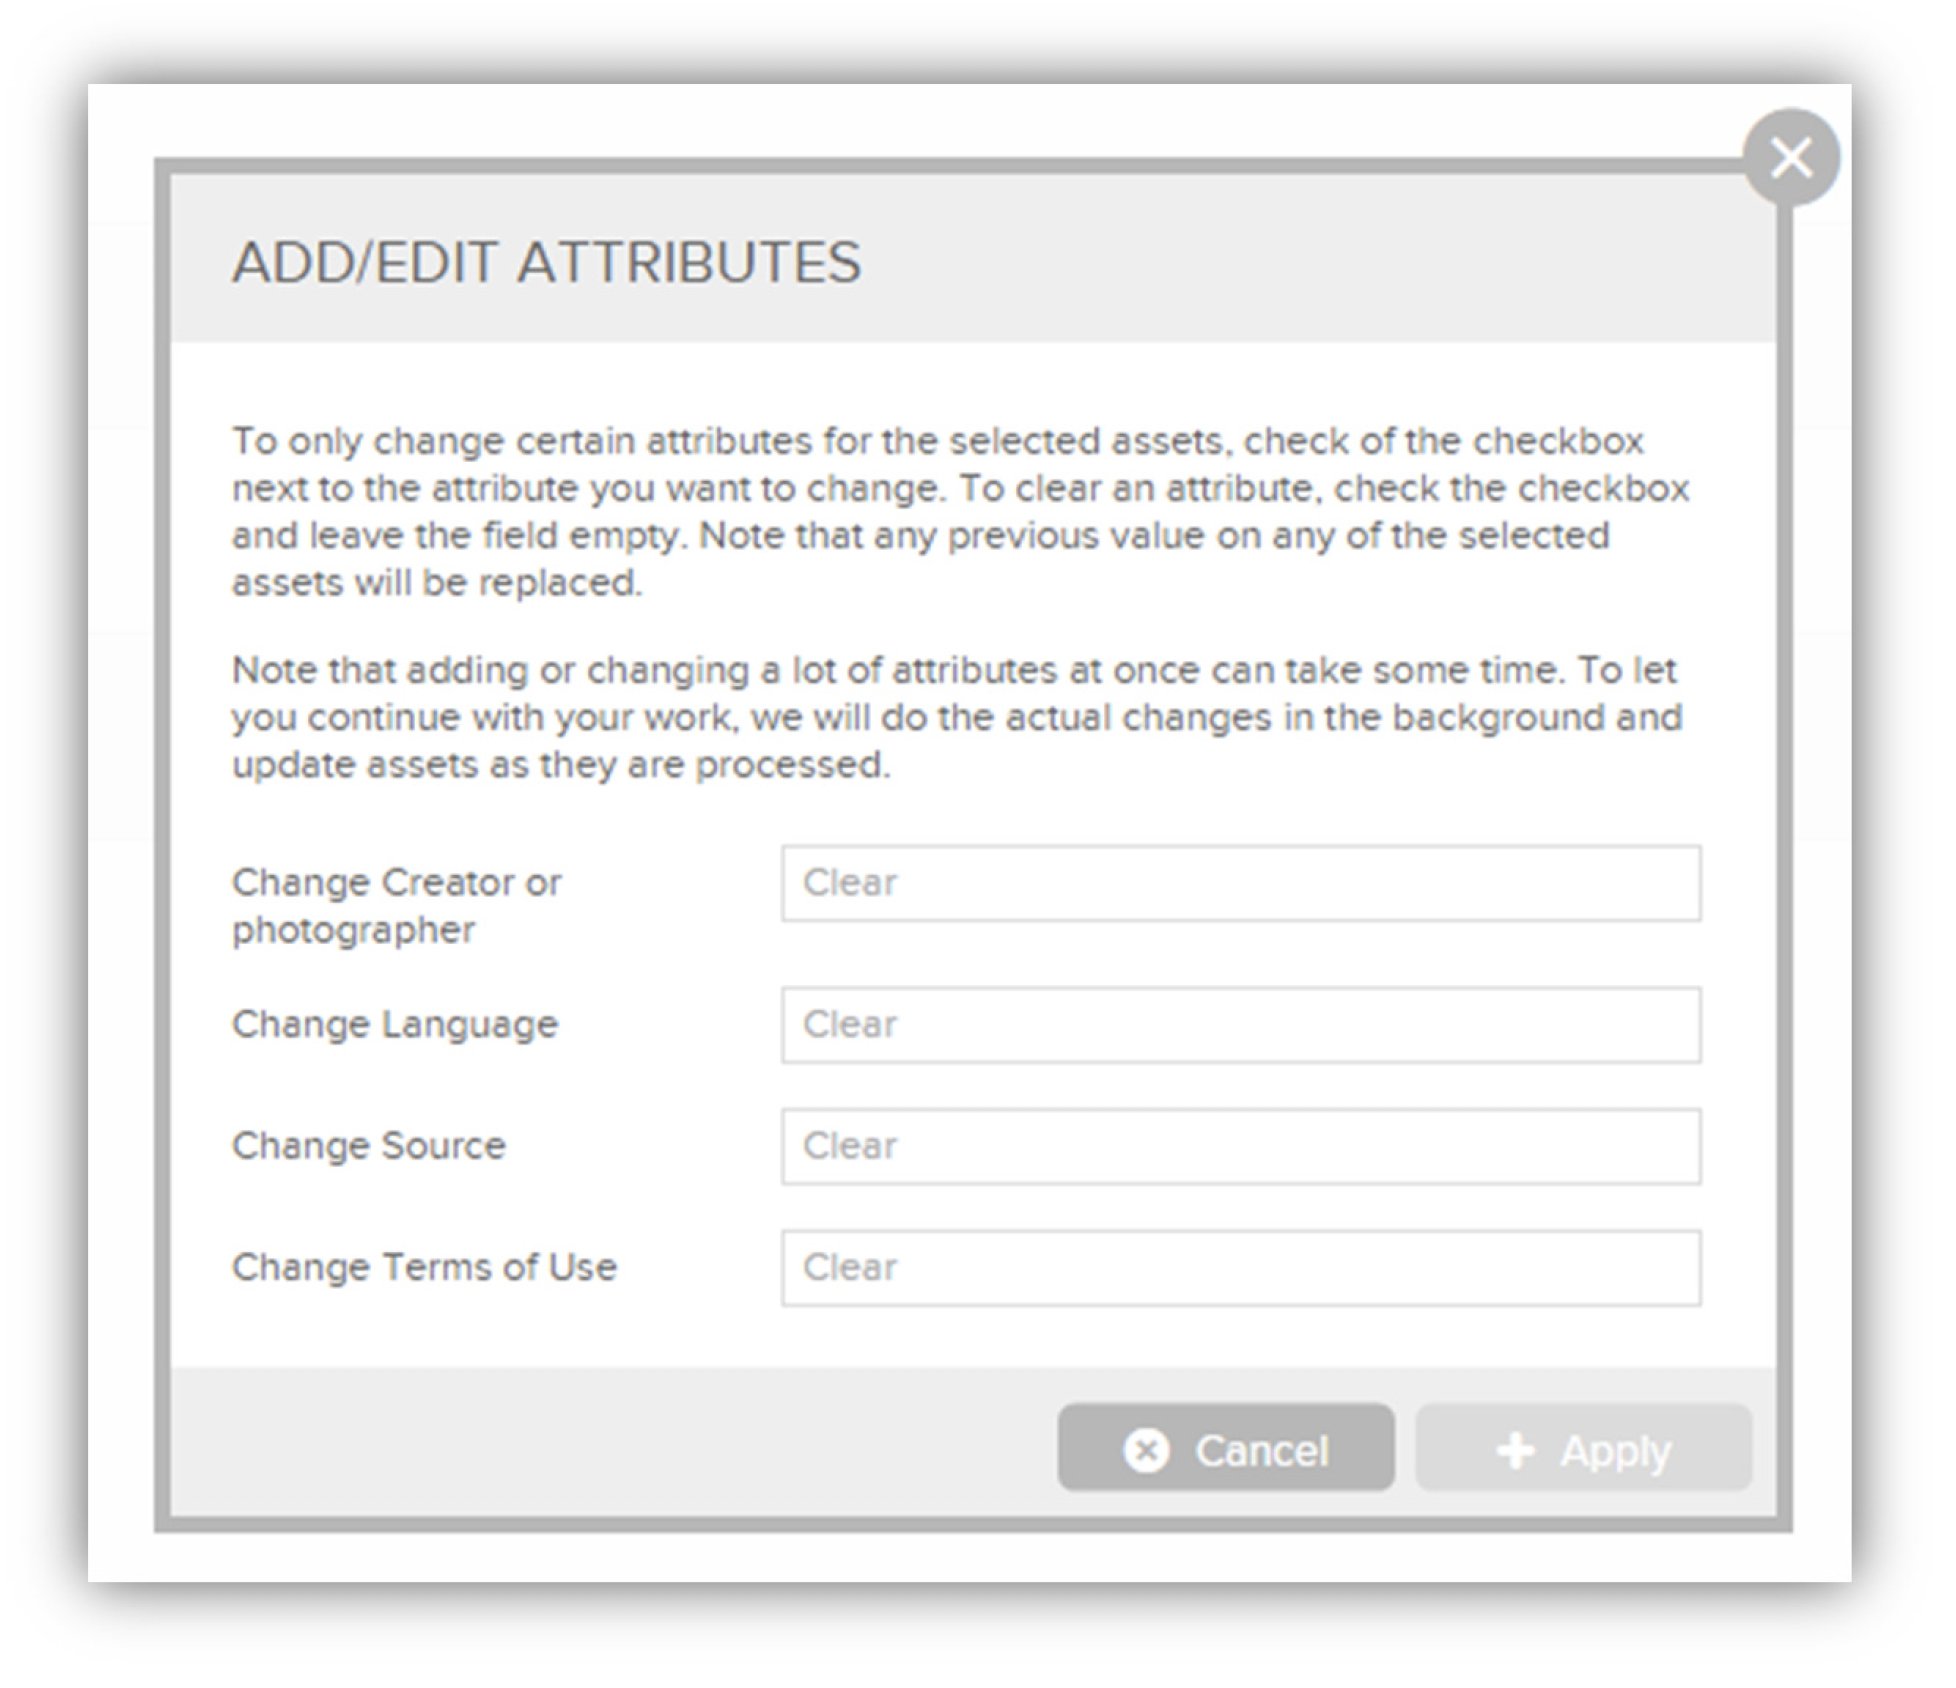
STEP 4: Completing the attributes
Almost done, you just need to complete a few more fields before you can submit the assets. In step four you will be asked to fill out some important fields such as the Source and Terms of Use for your Assets, please provide as much detail as possible. Once you’re happy with the attributes for each asset you can click “Continue” to move to the next step.
Step 5: Title and description
In this step, you will be asked to review the Titles and Descriptions for your assets. Your assets will be given a title that matches the file name but you have the opportunity here to set the title to be something more readable. You also have the opportunity to add a description and provide any additional information you may wish to include about the asset.
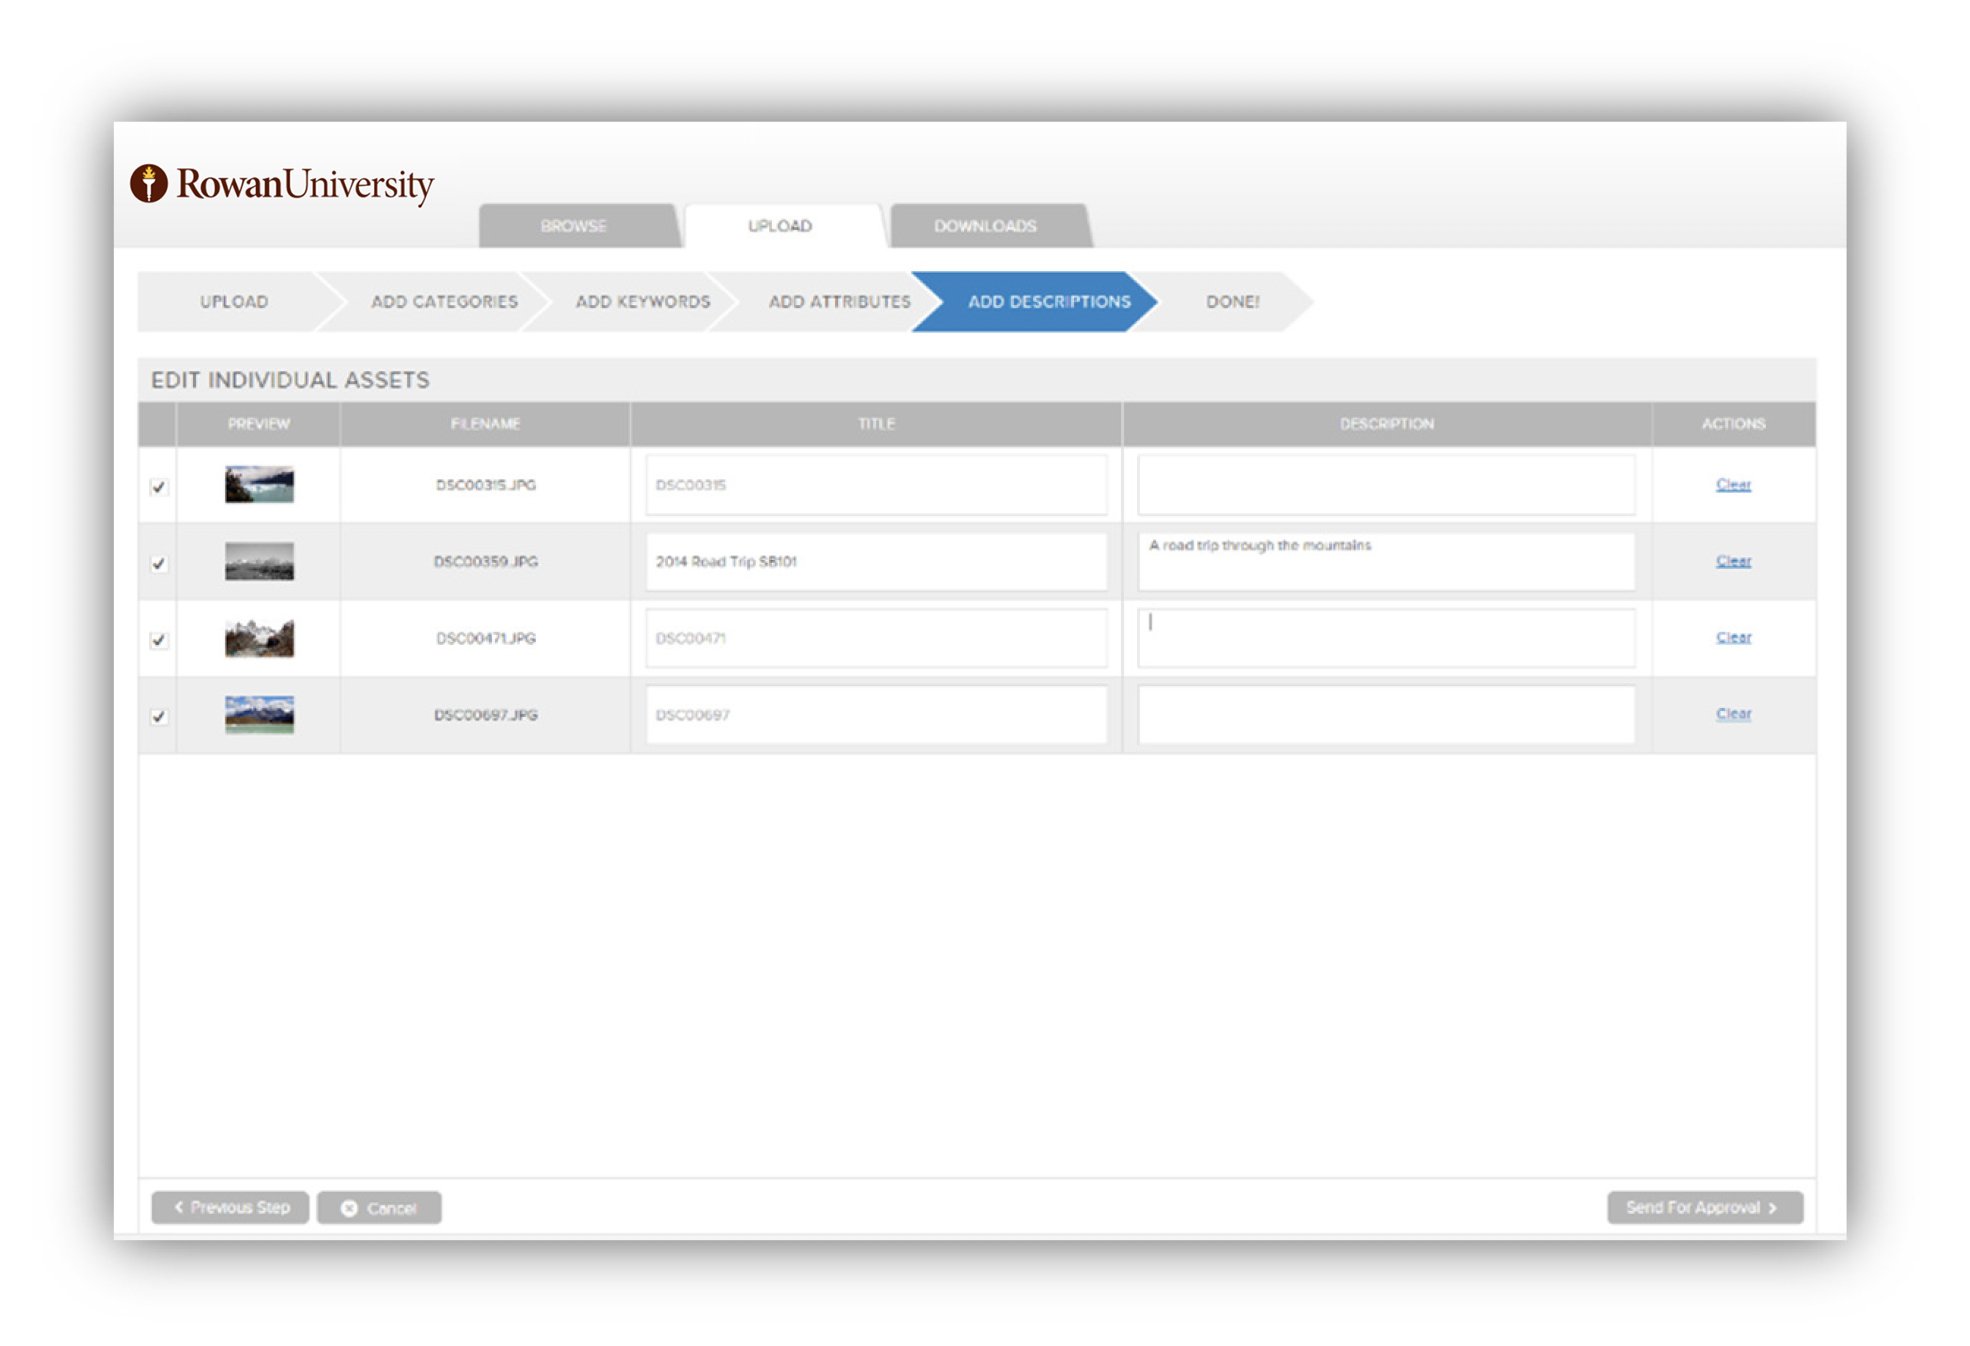 And once you’re done, click on “Submit for Approval” at the bottom right of the page.
Step 6: Submitting for approval
The final step is to submit your assets for approval
To ensure your assets are all stored together we start by adding them to a lightbox (it’s like a temporary folder). To add them to a new lightbox you just need to enter a name for your lightbox in the first text area—so using our example we might create a lightbox called “Student Life and Public Art 2020.” If you are returning to this upload screen for a second time you might have already created a lightbox. If so you can just select it from the drop-down.
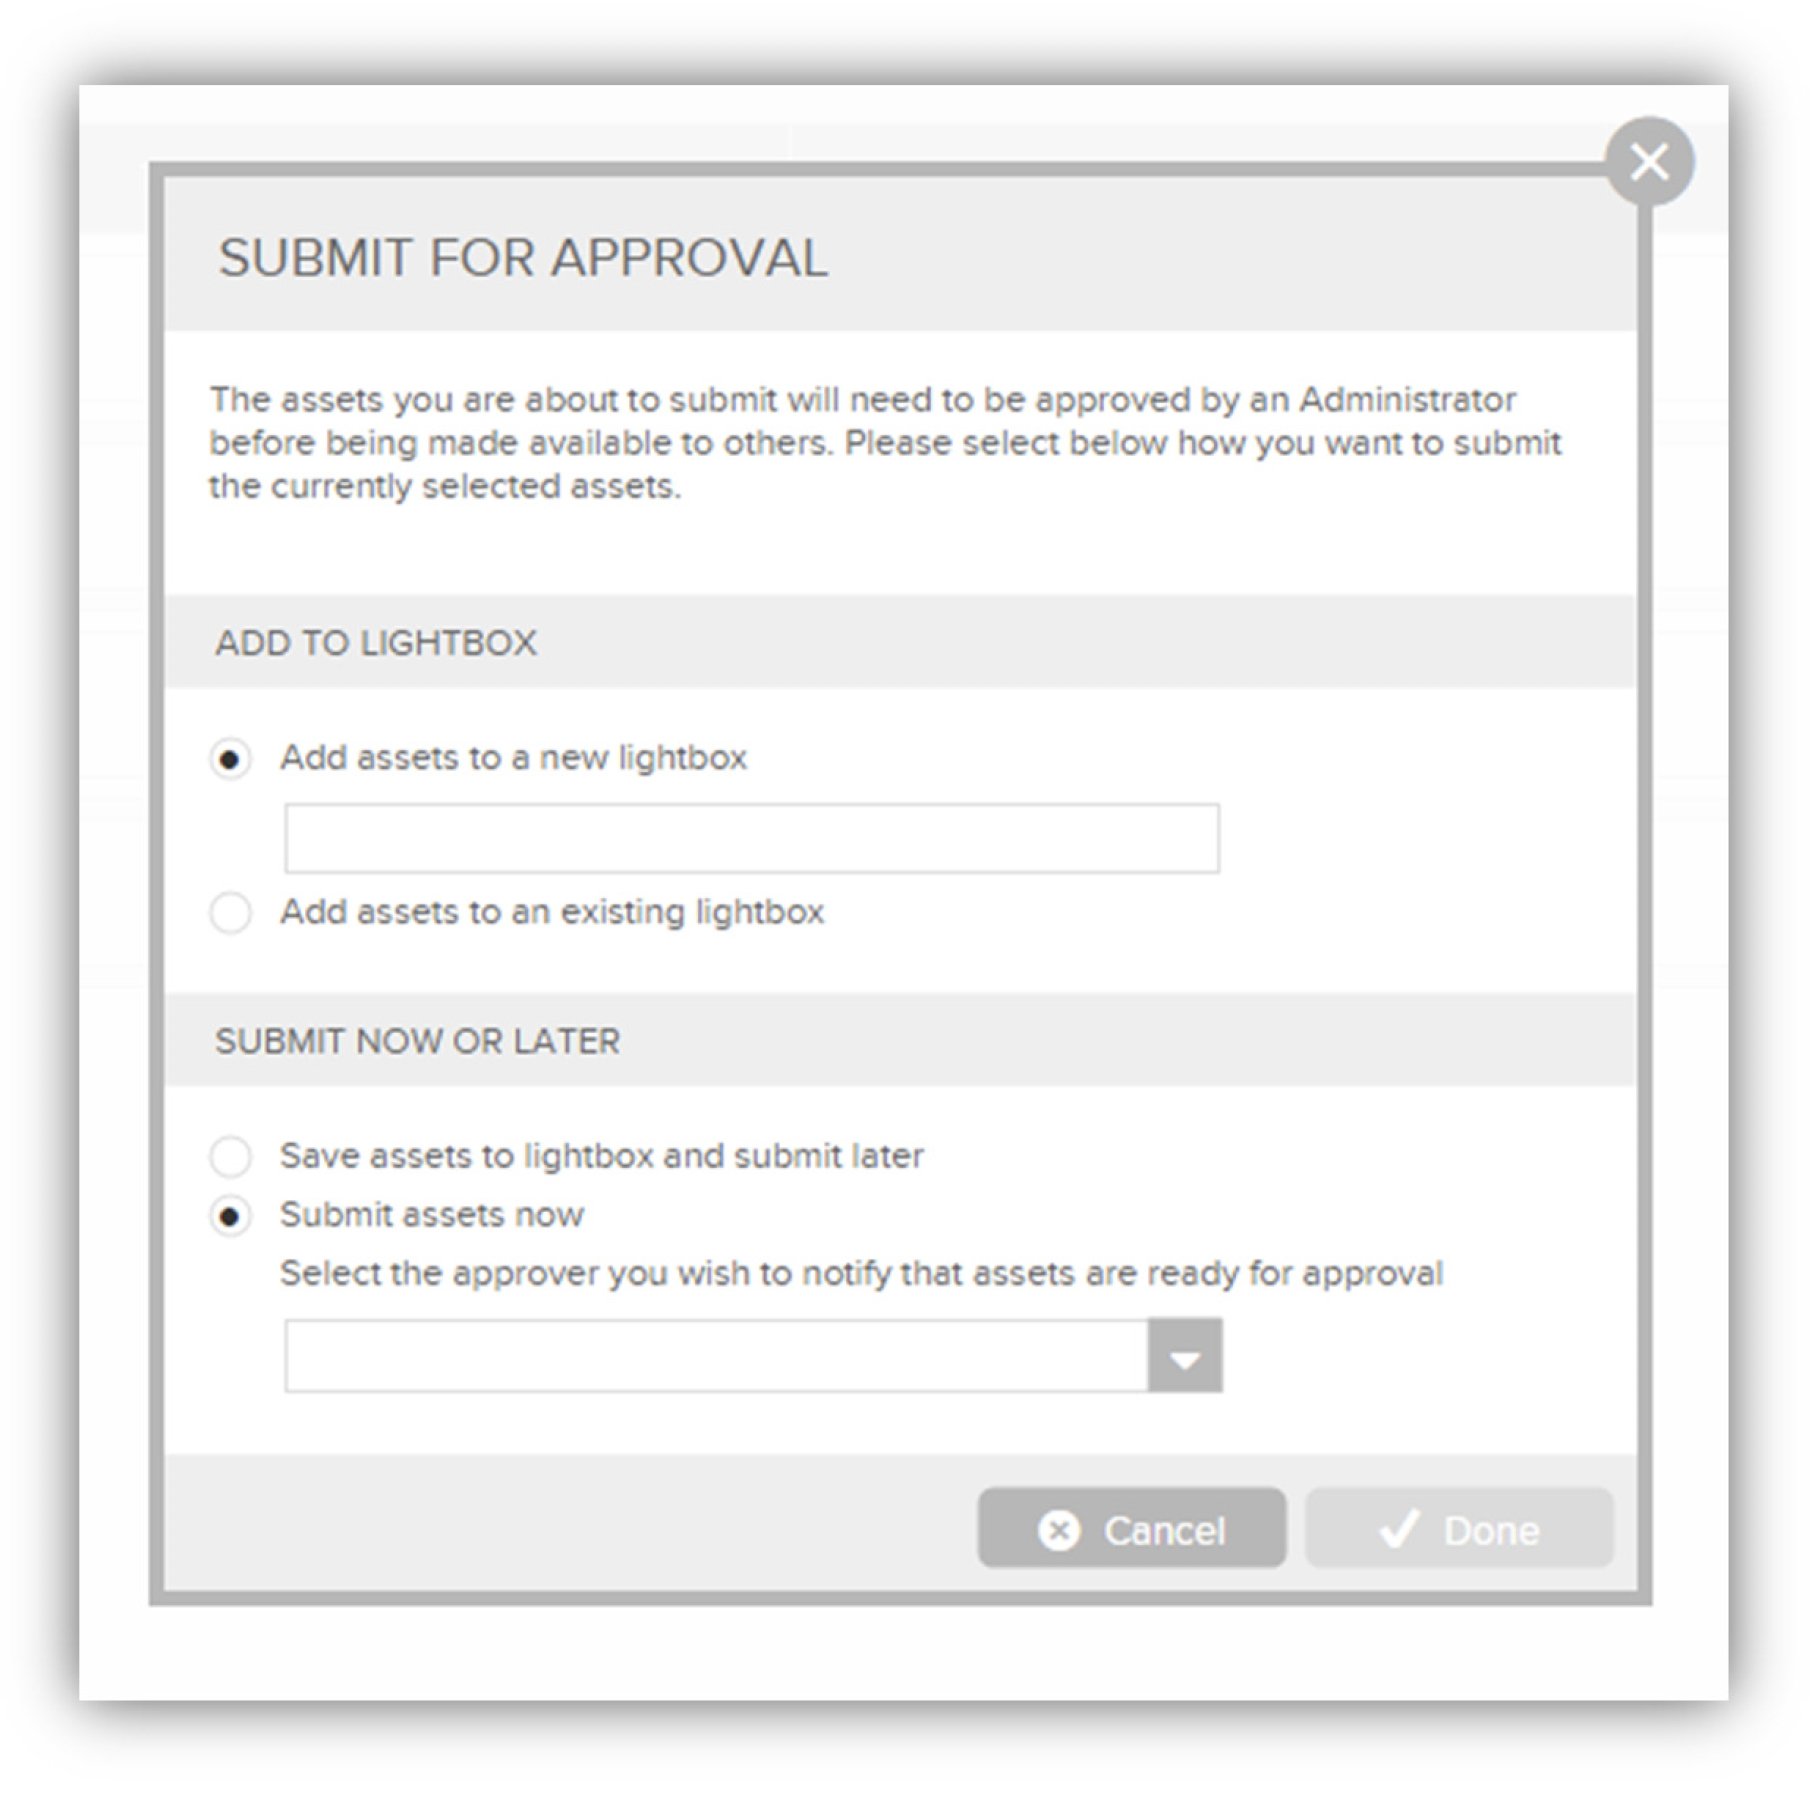
You may not want to submit your assets just yet. If that’s the case, it’s no problem—you can save your assets to the lightbox and come back later to add some more and then submit.
If you decide that you are ready to submit your assets—all you need to do to finish the process is to select someone from the drop-down to approve your assets and then click on the “Done” button at the bottom of the window.